Yesterday I went up to the yard to see how they’d got on with moving the autohelm linear drive, and the sound insulation. Alas, the drive hasn’t been moved yet, but the removable panels have been insulated. This let me put the battens back onto the companionway step, and then trim the slight overhang at the back of the area the step slots in to so it would fit cleanly. I’ve always found that this step panel is a bit hard to remove in winter, so I dug out my feeler gauges and confirmed what I thought might be the issue – the left side (looking aft) has 0.3mm clearance easily, but by about 5/6 of the way to the right, there’s no clearance left. I’ll have to take some sandpaper to it.
Other than the linear drive (I had hoped to reconfigure the autohelm to go past 22 degrees), the list for the day was basically “finish jobs and tidy up”.
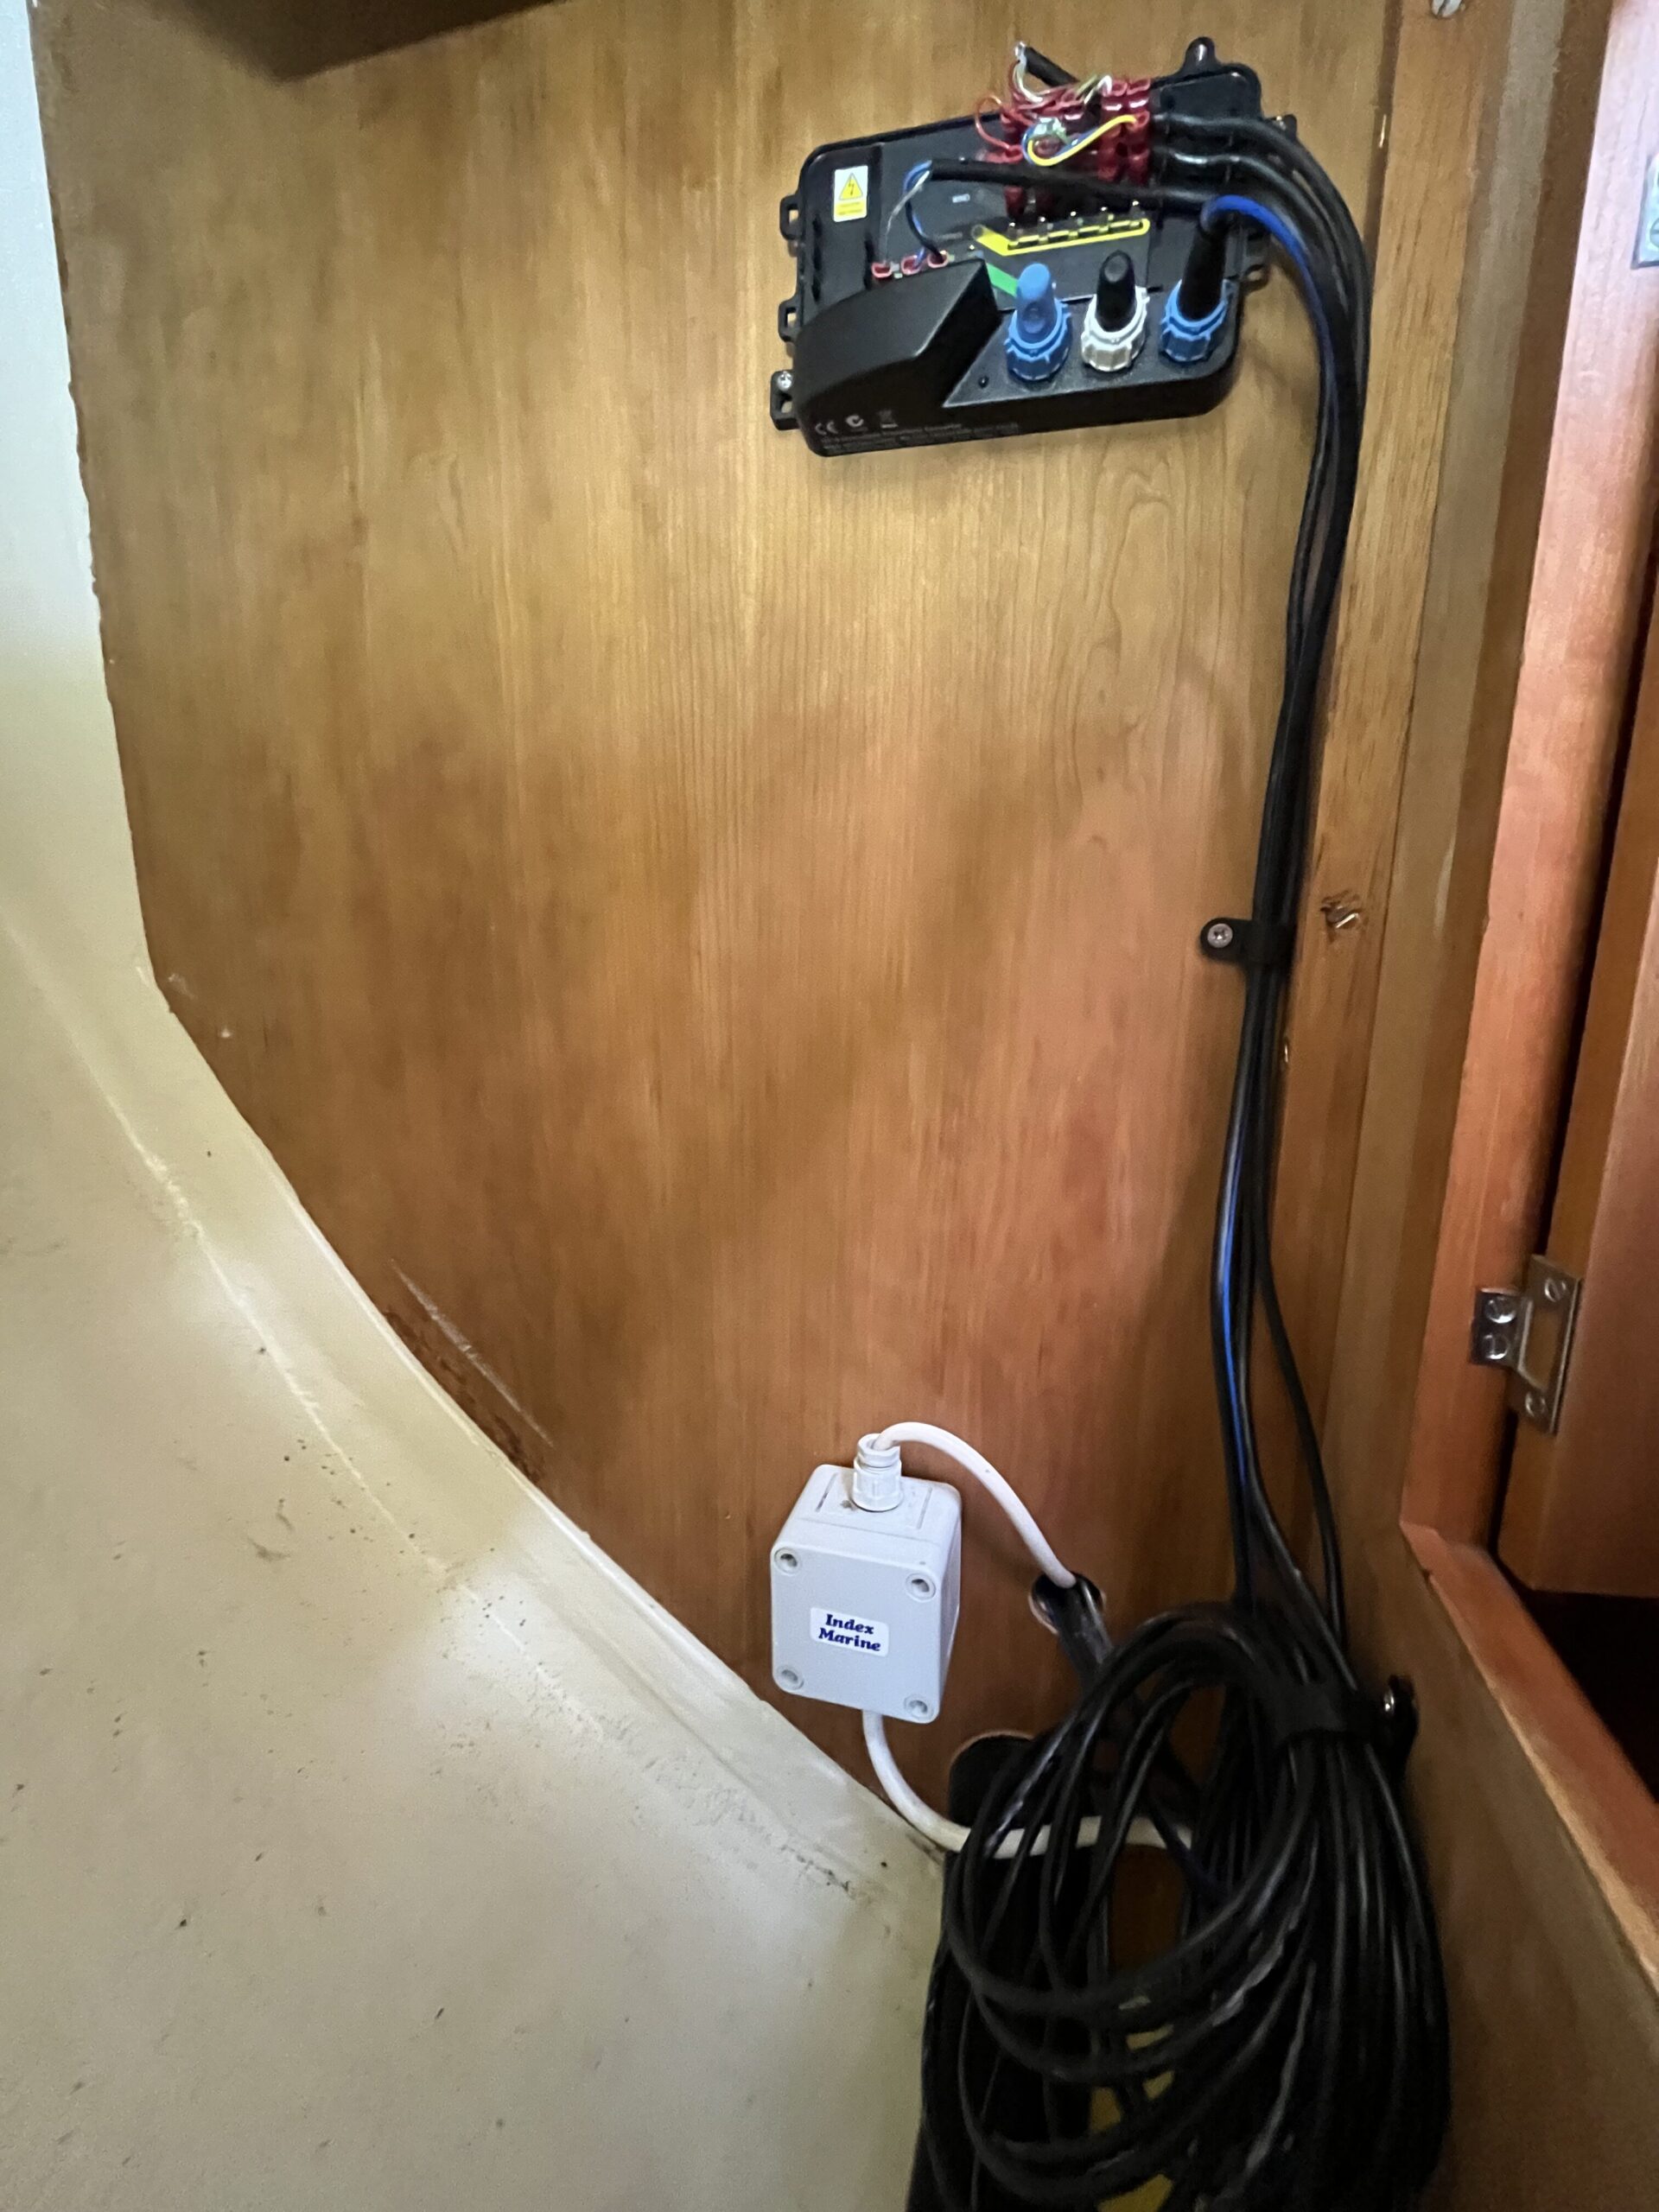
I started by working out how to get the transducer cable from the mast (wind) over to the starboard locker of the bow cabin; the other transducers have had their cabling pulled back to there, and the backbone was pulled into it. There’s no hanging rail in this locker, so it tends to just get life jackets dumped into it. From an earlier set of work, I’ve already got gubbins on the forward bulkhead of the locker, and with the ITC-5 work I’ve now got gubbins on the aft bulkhead of the locker.
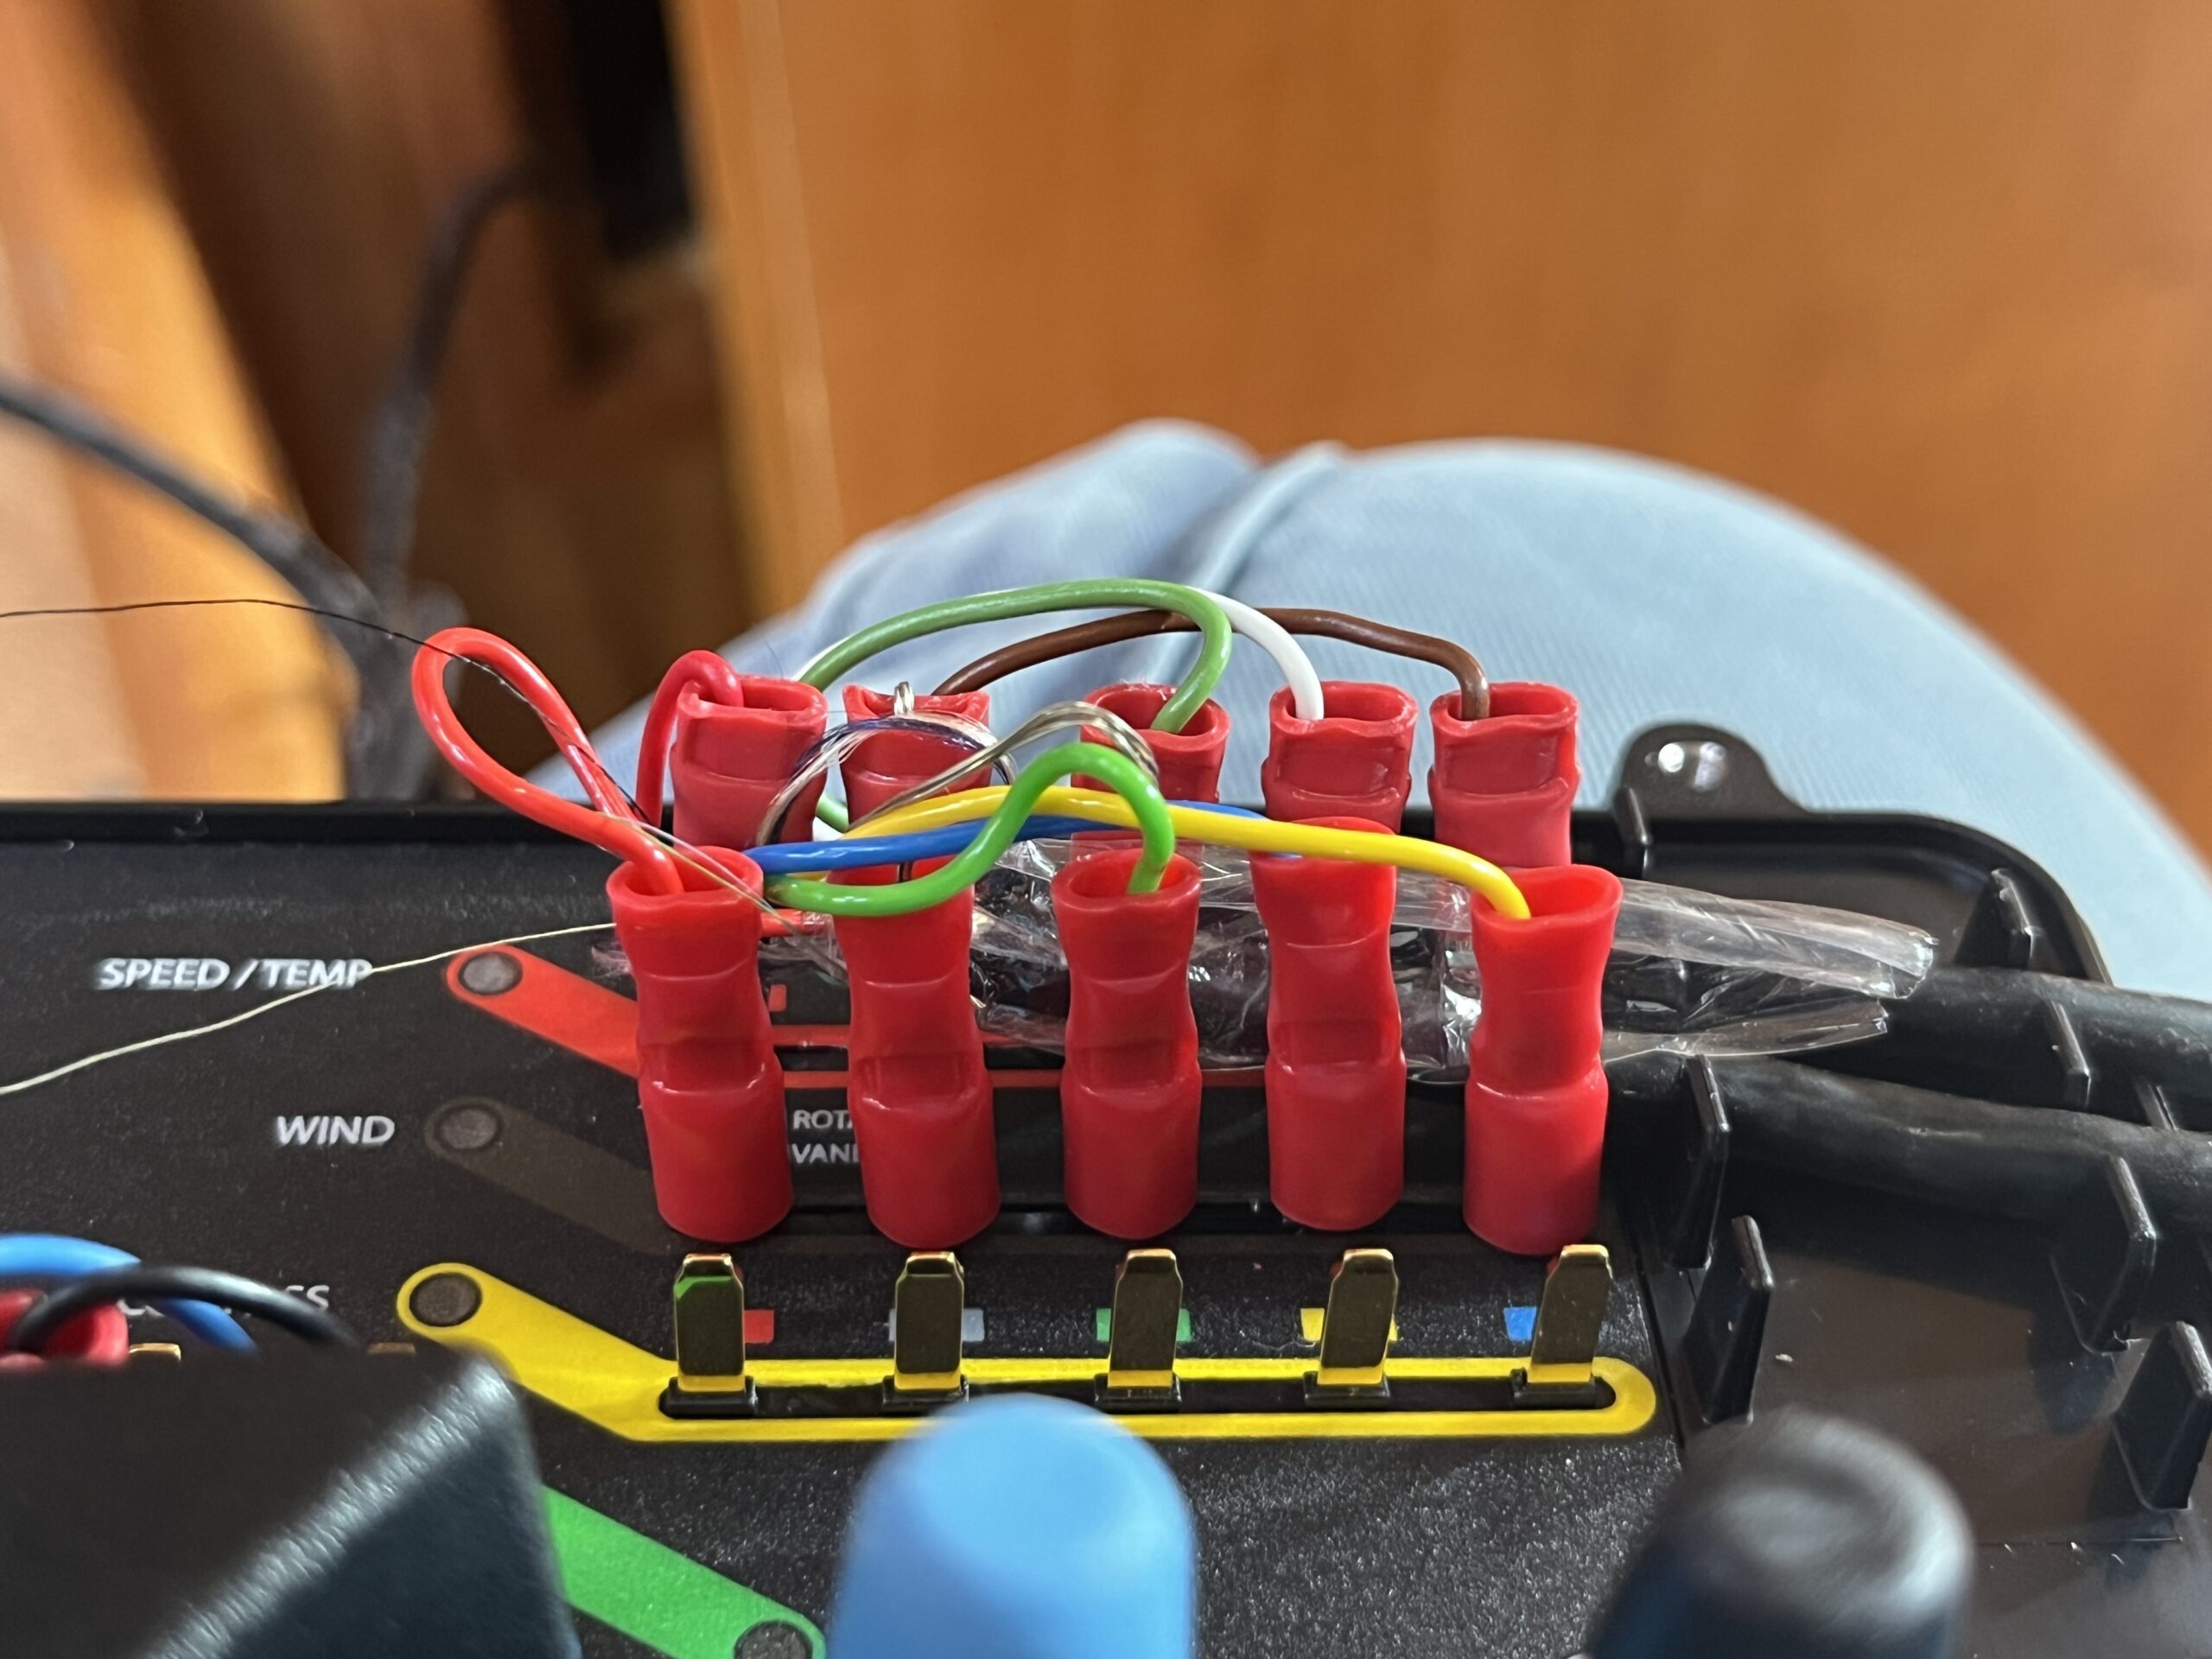
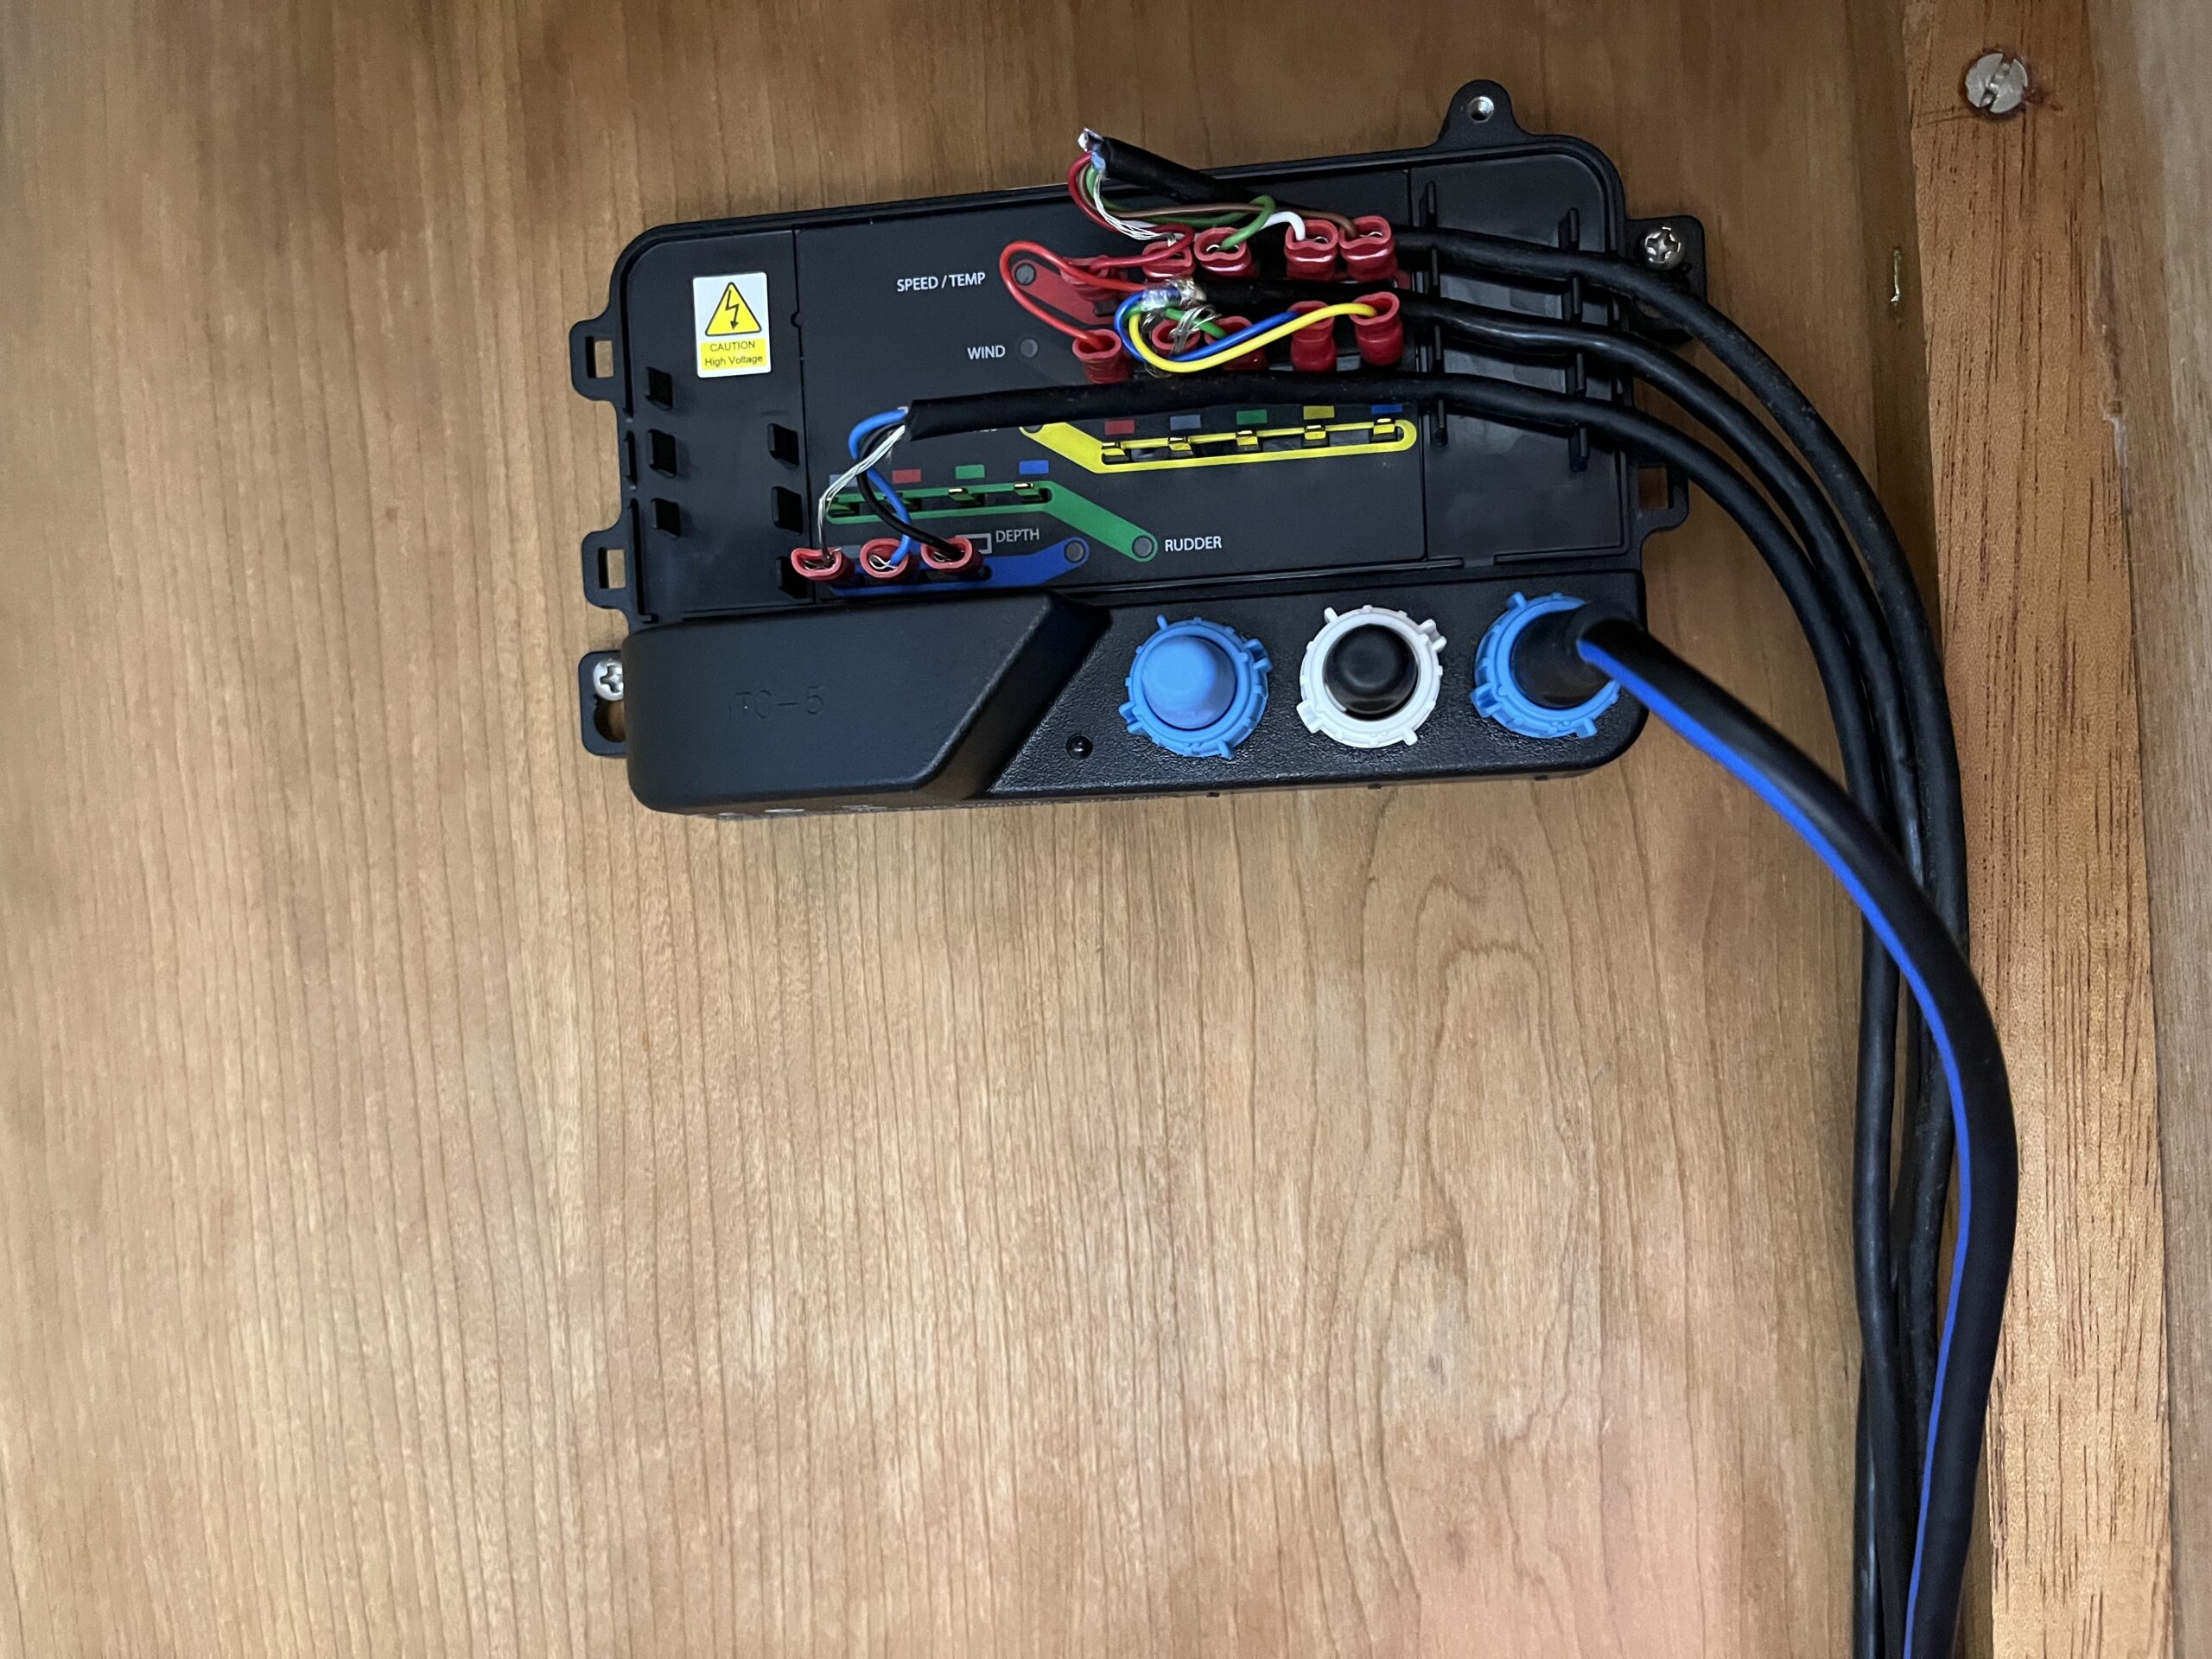
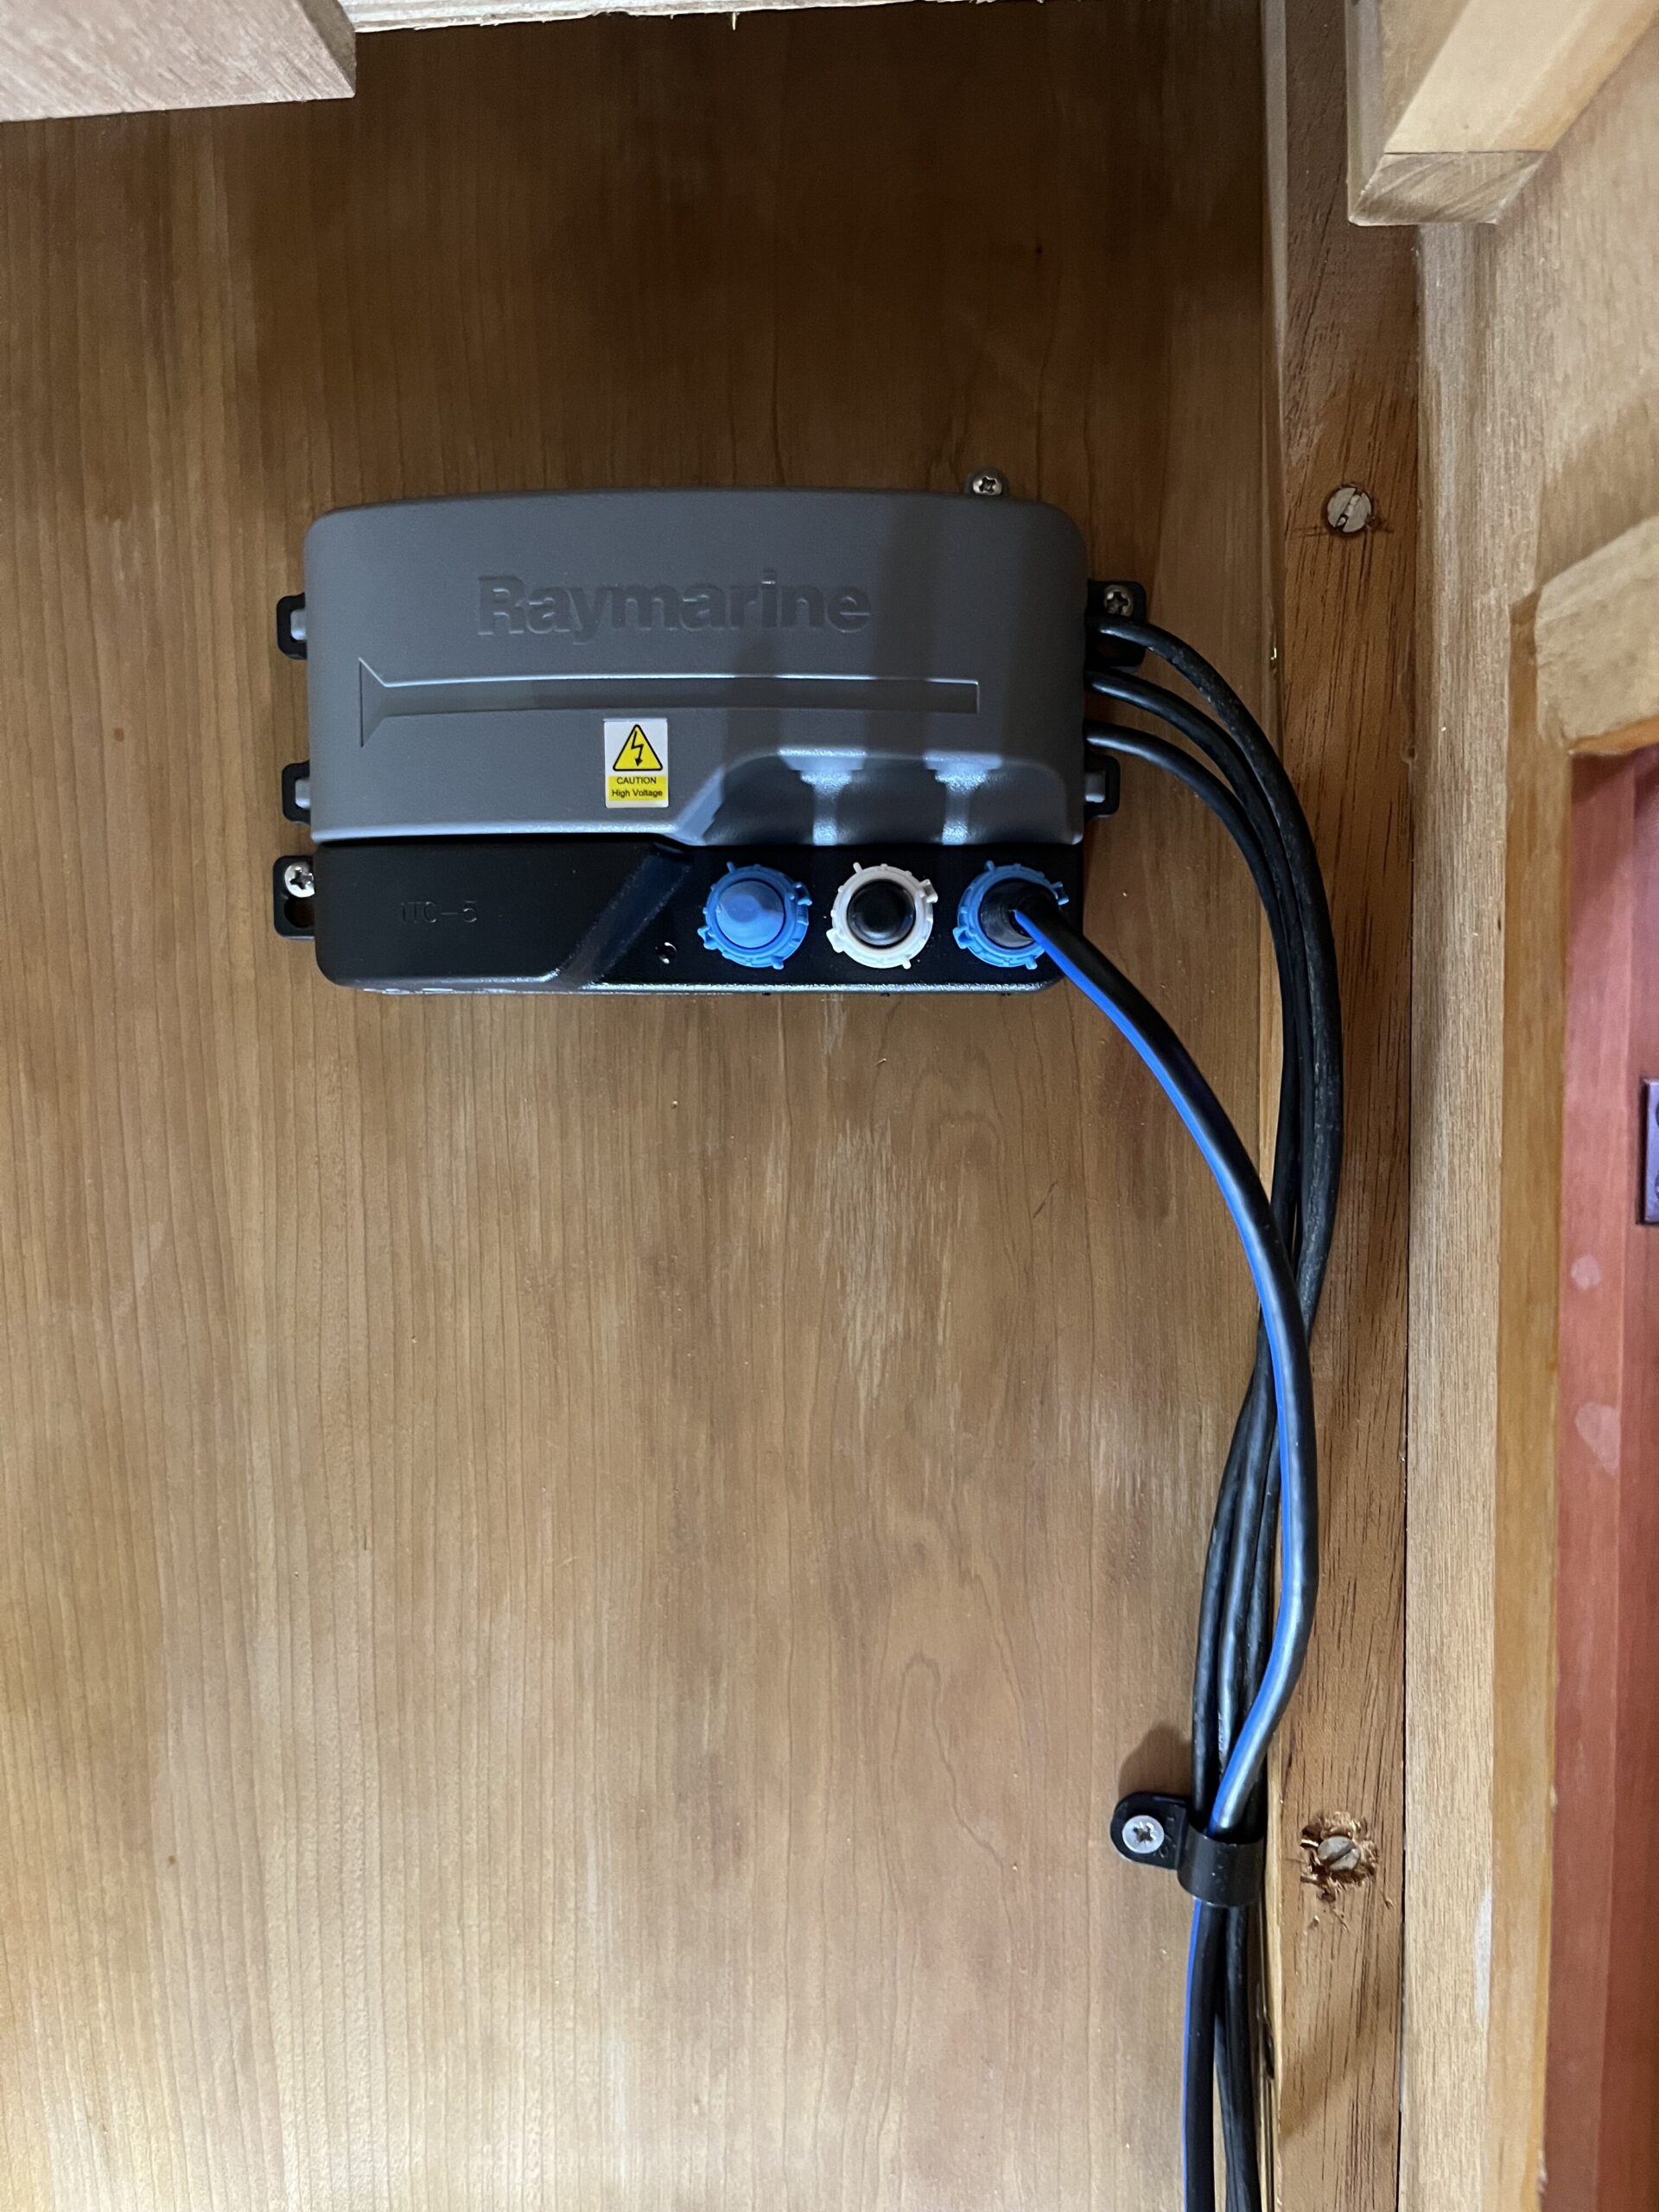
Getting the ITC-5 installed was a bit of a pain – the locker door is not as wide as my shoulders, and as the last photo hints at, the unit is above the top of the door frame (but below the drawer). However, with a lot of twisting and grunting, I was able to get the pilot holes started (but not fully drilled as I forgot to bring the 2mm drill bit). Normally I appreciate the 5Ah battery that’s on the drill, but I would have loved to have the lighter 2Ah (which I don’t own) on it for this work. Unfortunately, it looks like Makita don’t make the BL1820B any more, and everywhere is either out of stock, or ridiculously priced. The next step up, a 3Ah, weighs almost as much as the 5Ah!
Anyway, all of the extra cabling has been looped into a P-clip at the bottom of the locker; the building yard had use trunking to run across the bottom of the locker, as the transducer cables ran from under the berth, through the locker and onwards to the wiring locker at the chart table, and I basically re-used it to house the wind transducer cable. One hole had to be drilled from the port under-berth locker into the central drawer section, and the cable was P-clipped to the battens that hold the lid for the port under-berth locker, and zip-tied to the existing cable run (windlass) in the main port locker.
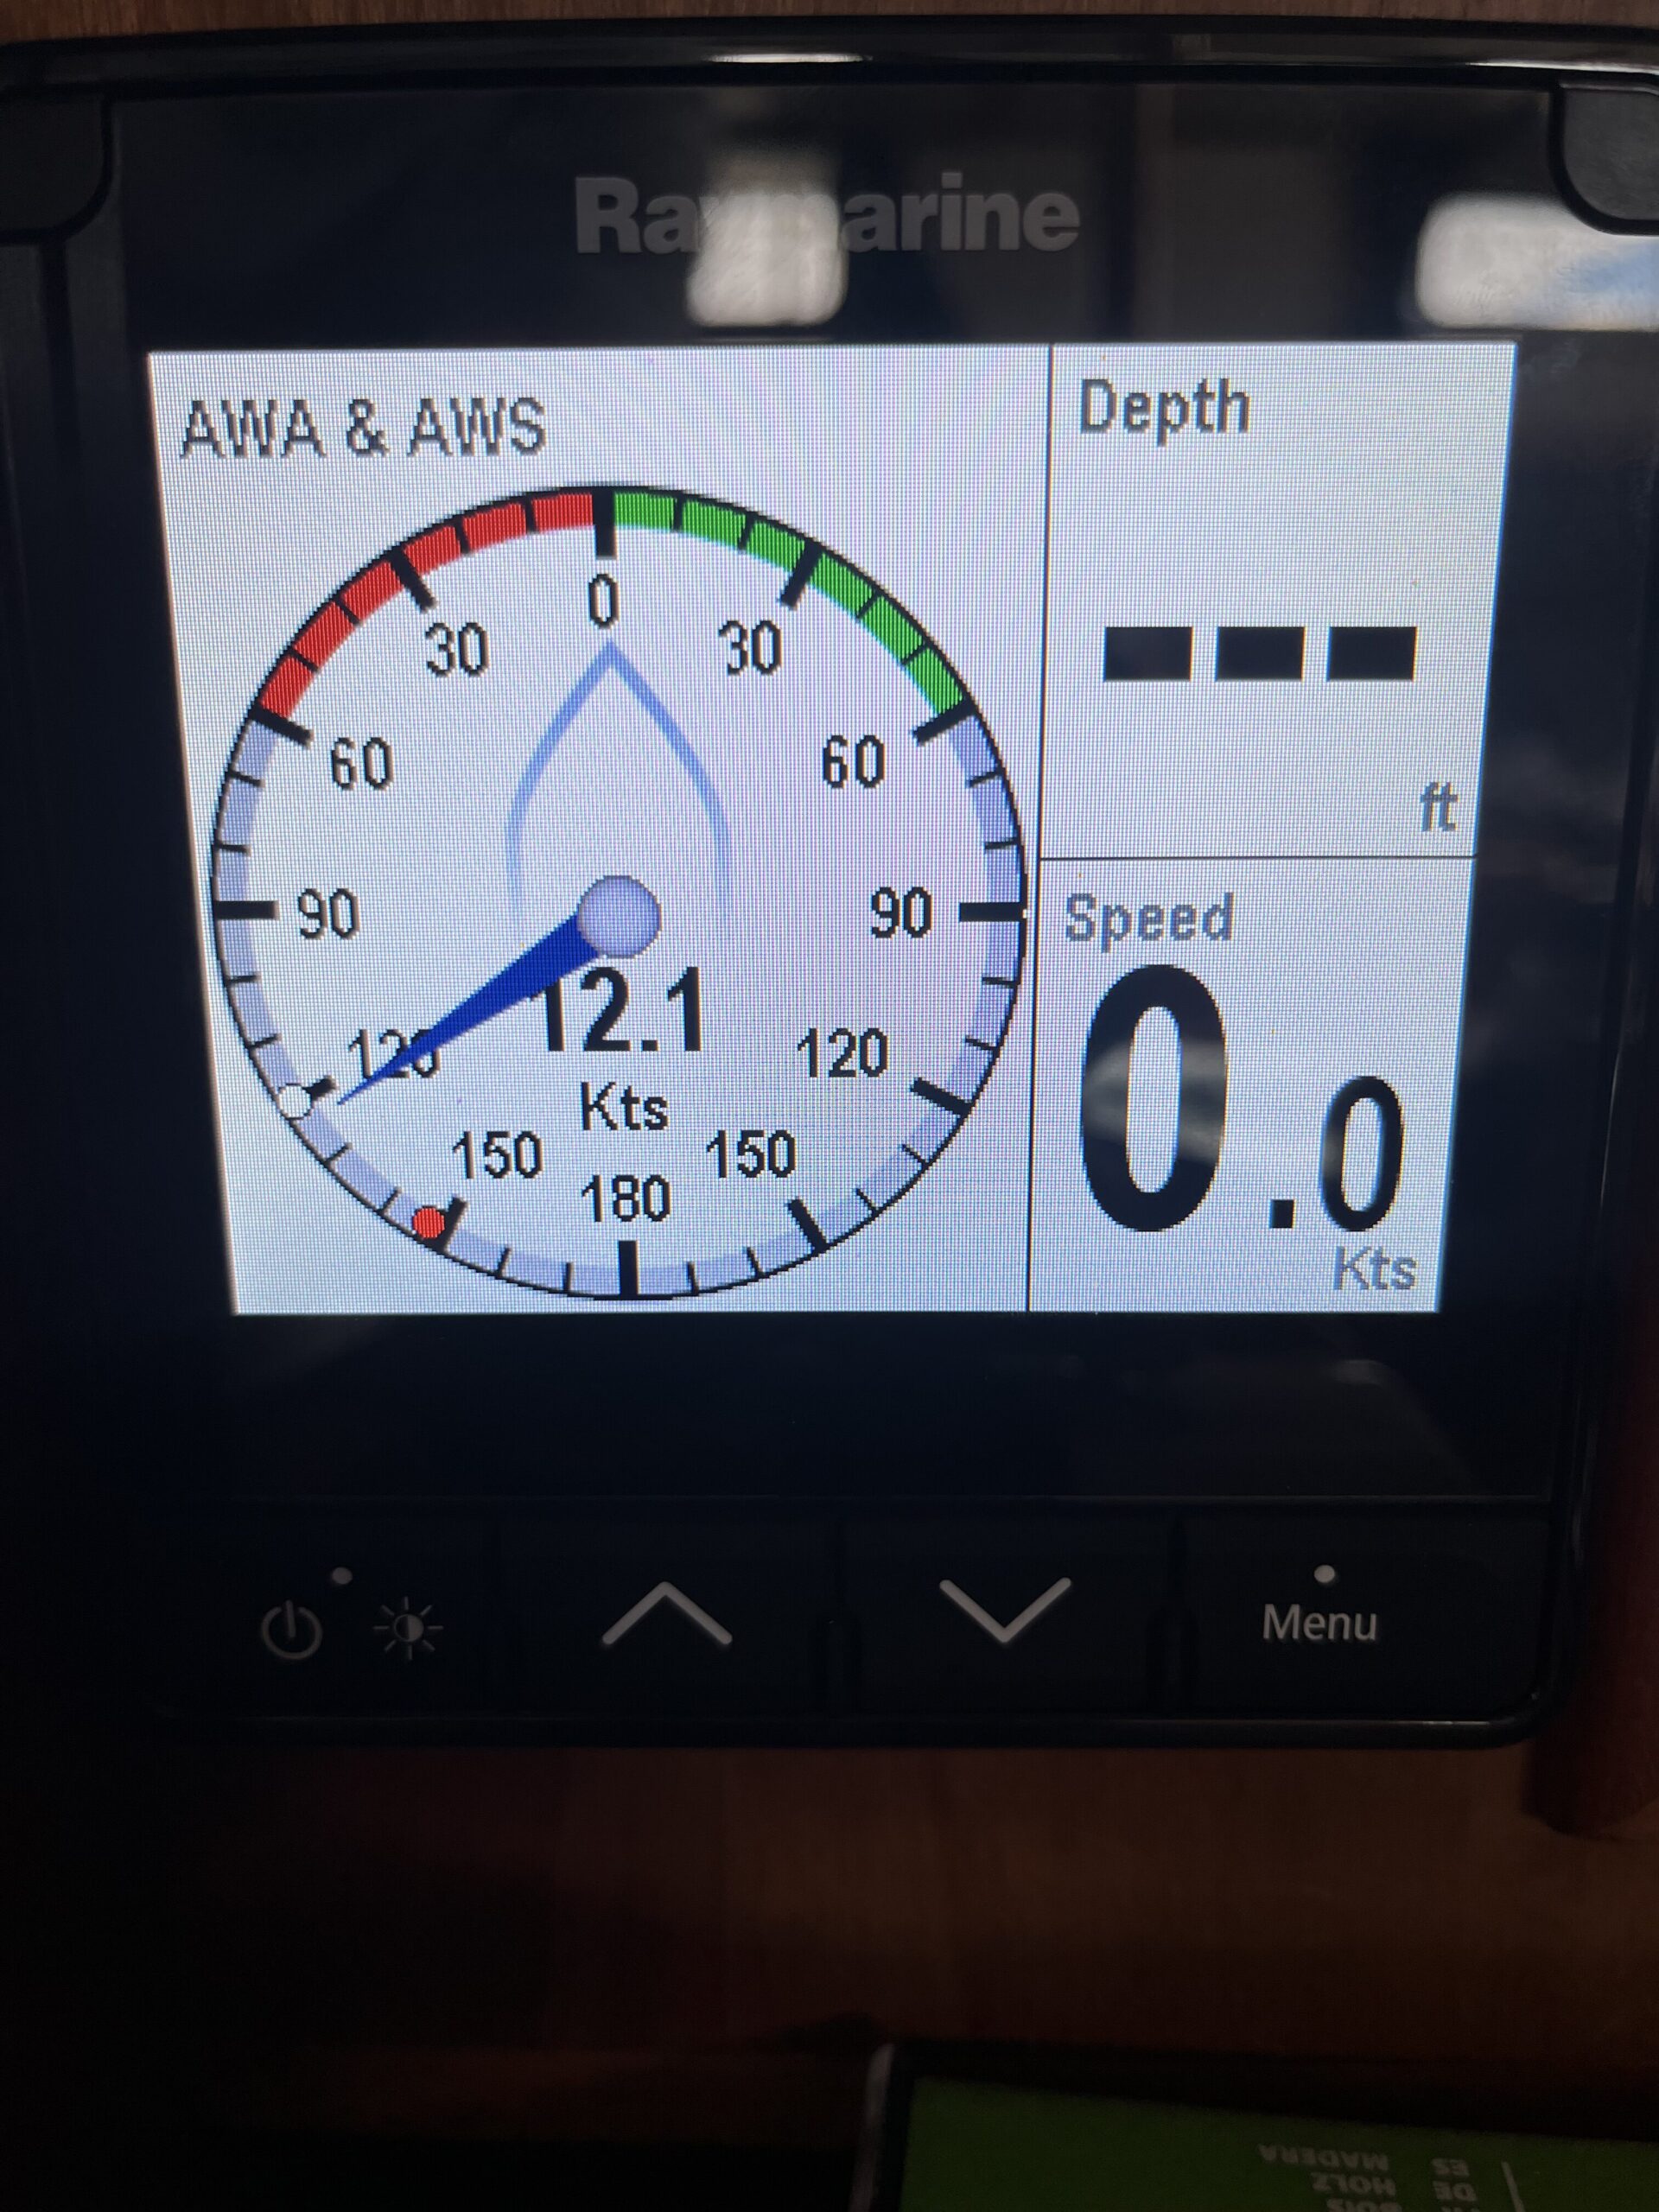
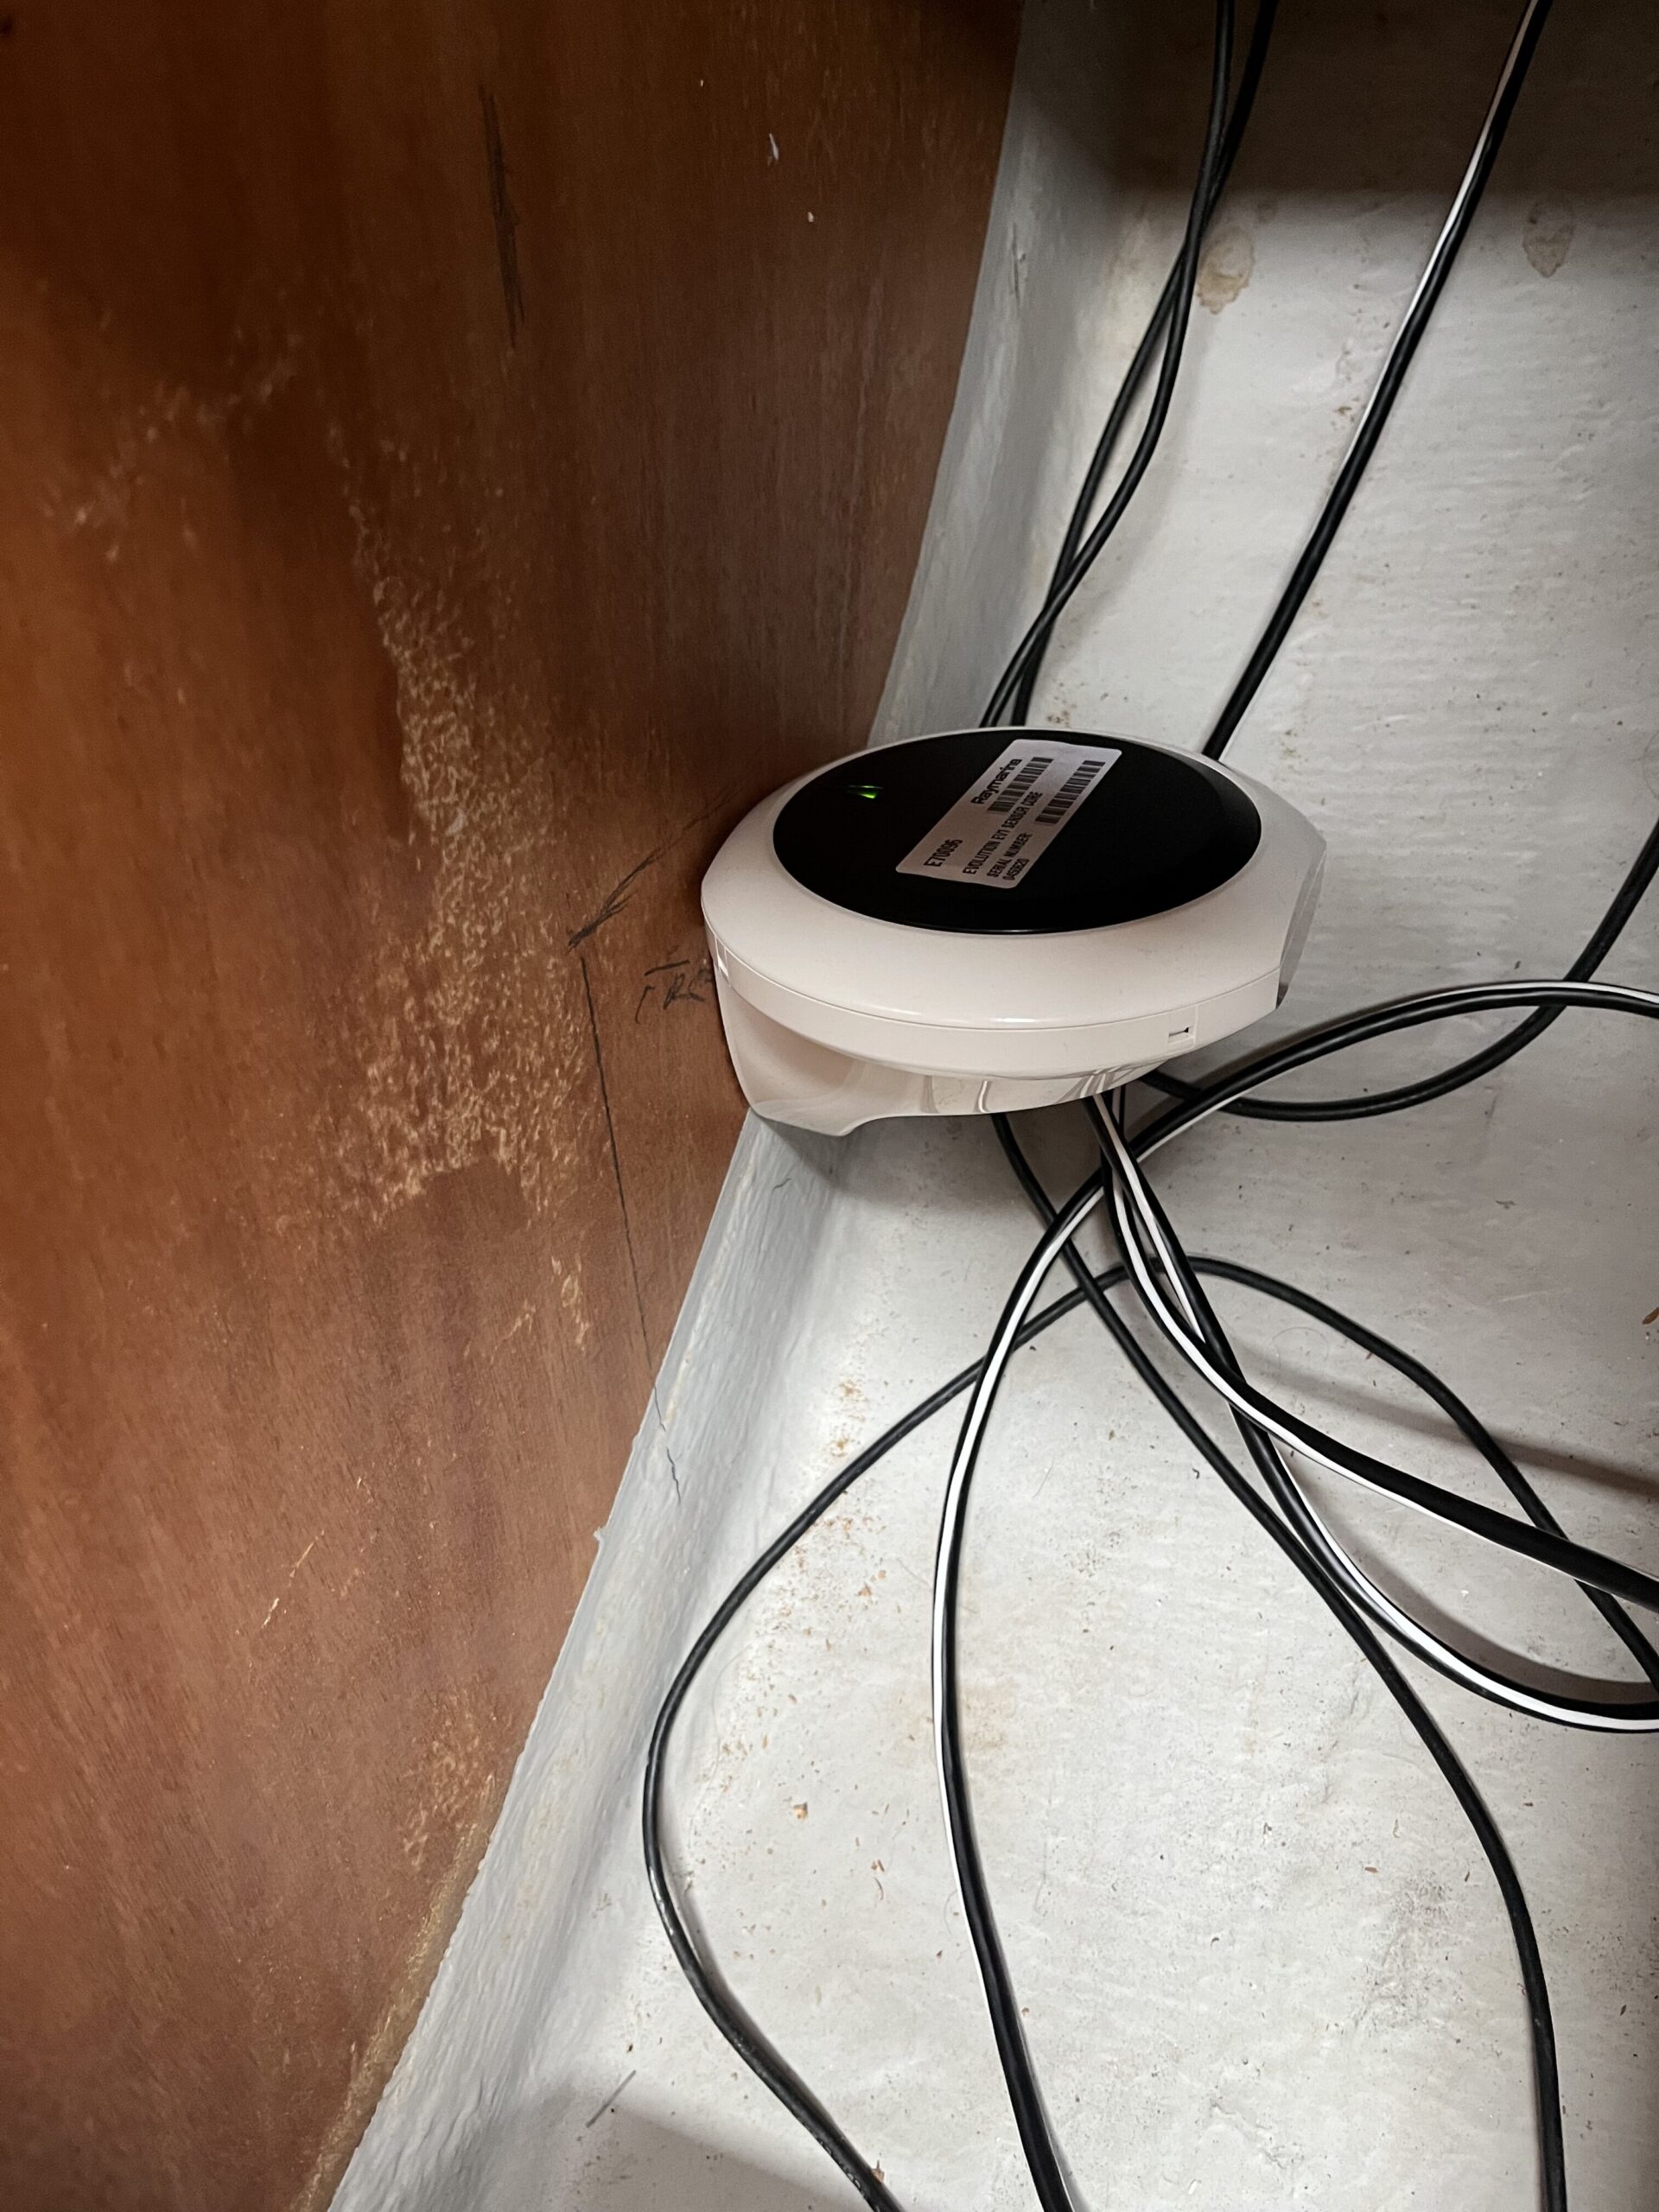
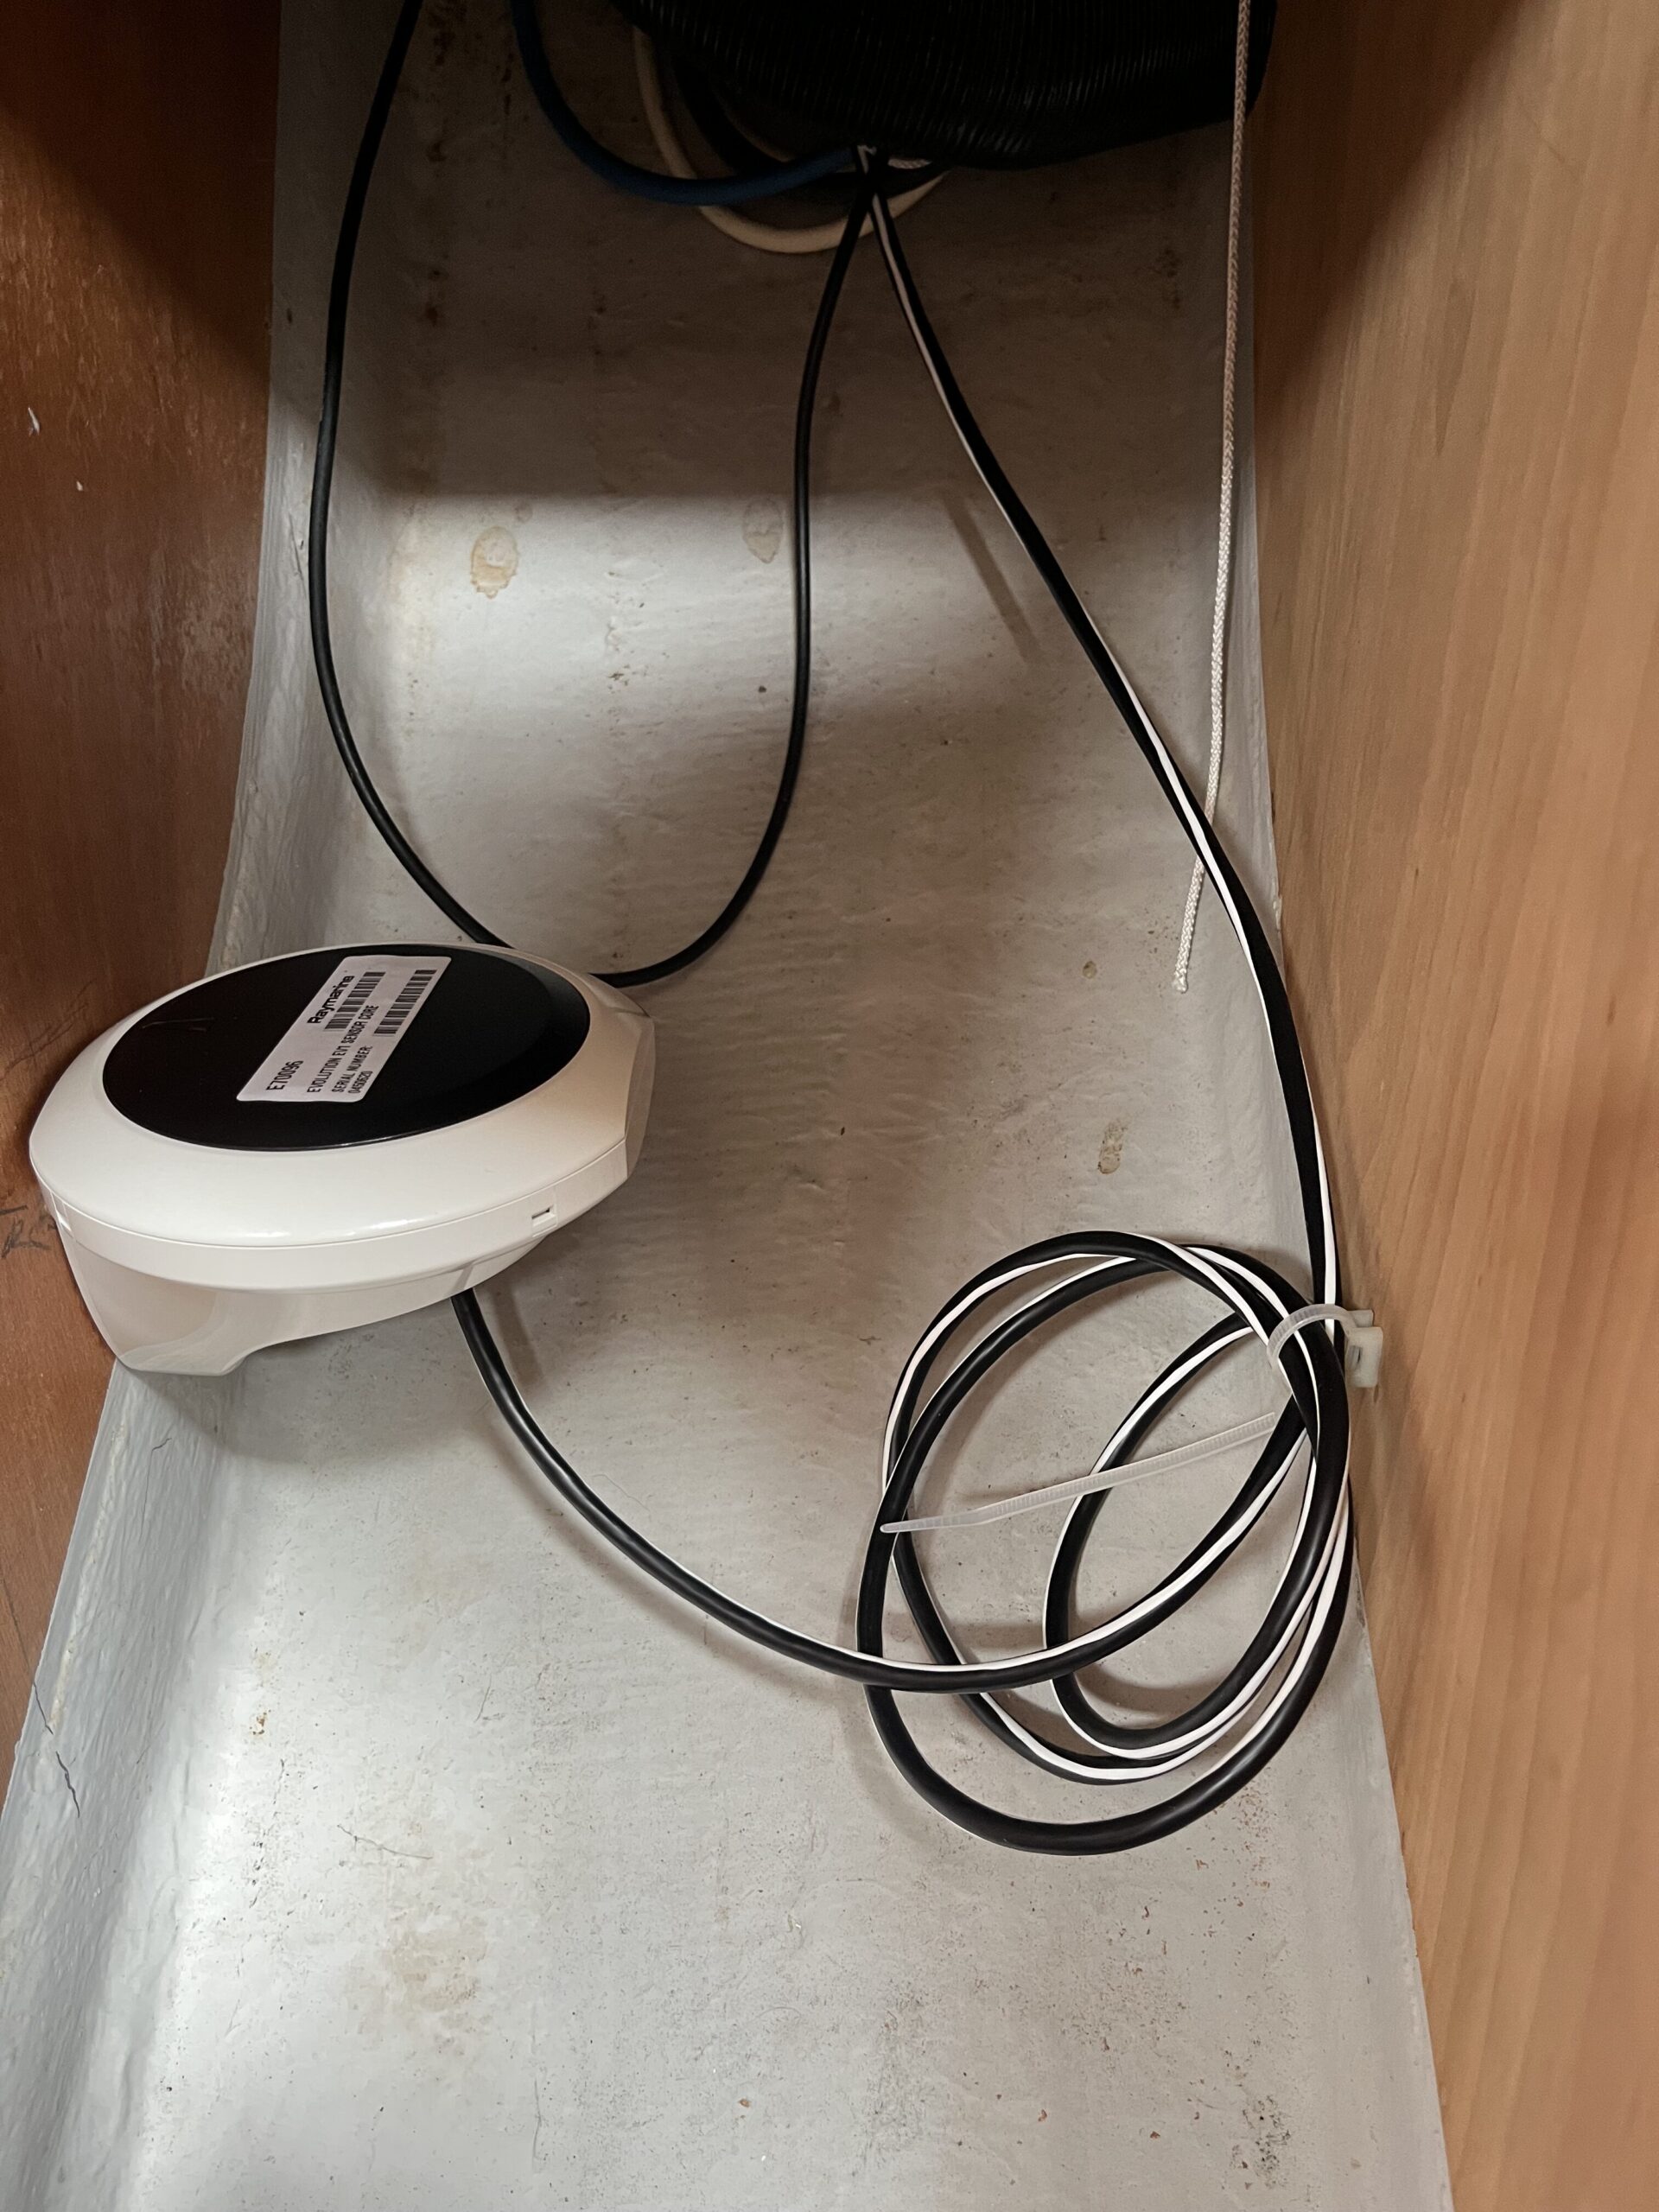
I also confirmed that the speed reading works after I cleaned a bunch of dead crap off of the paddle wheel. I need to check the repair manual to see how to knock the pin out, and then put it back, so that I can clean it properly.
With the ITC-5 all tidied up, I moved on to the wiring locker at the chart table. The existing layout was going to make it hard to fit in the two 5-way splitters, plus there was some dead cabling to be sorted out, and other cabling to be tidied up.
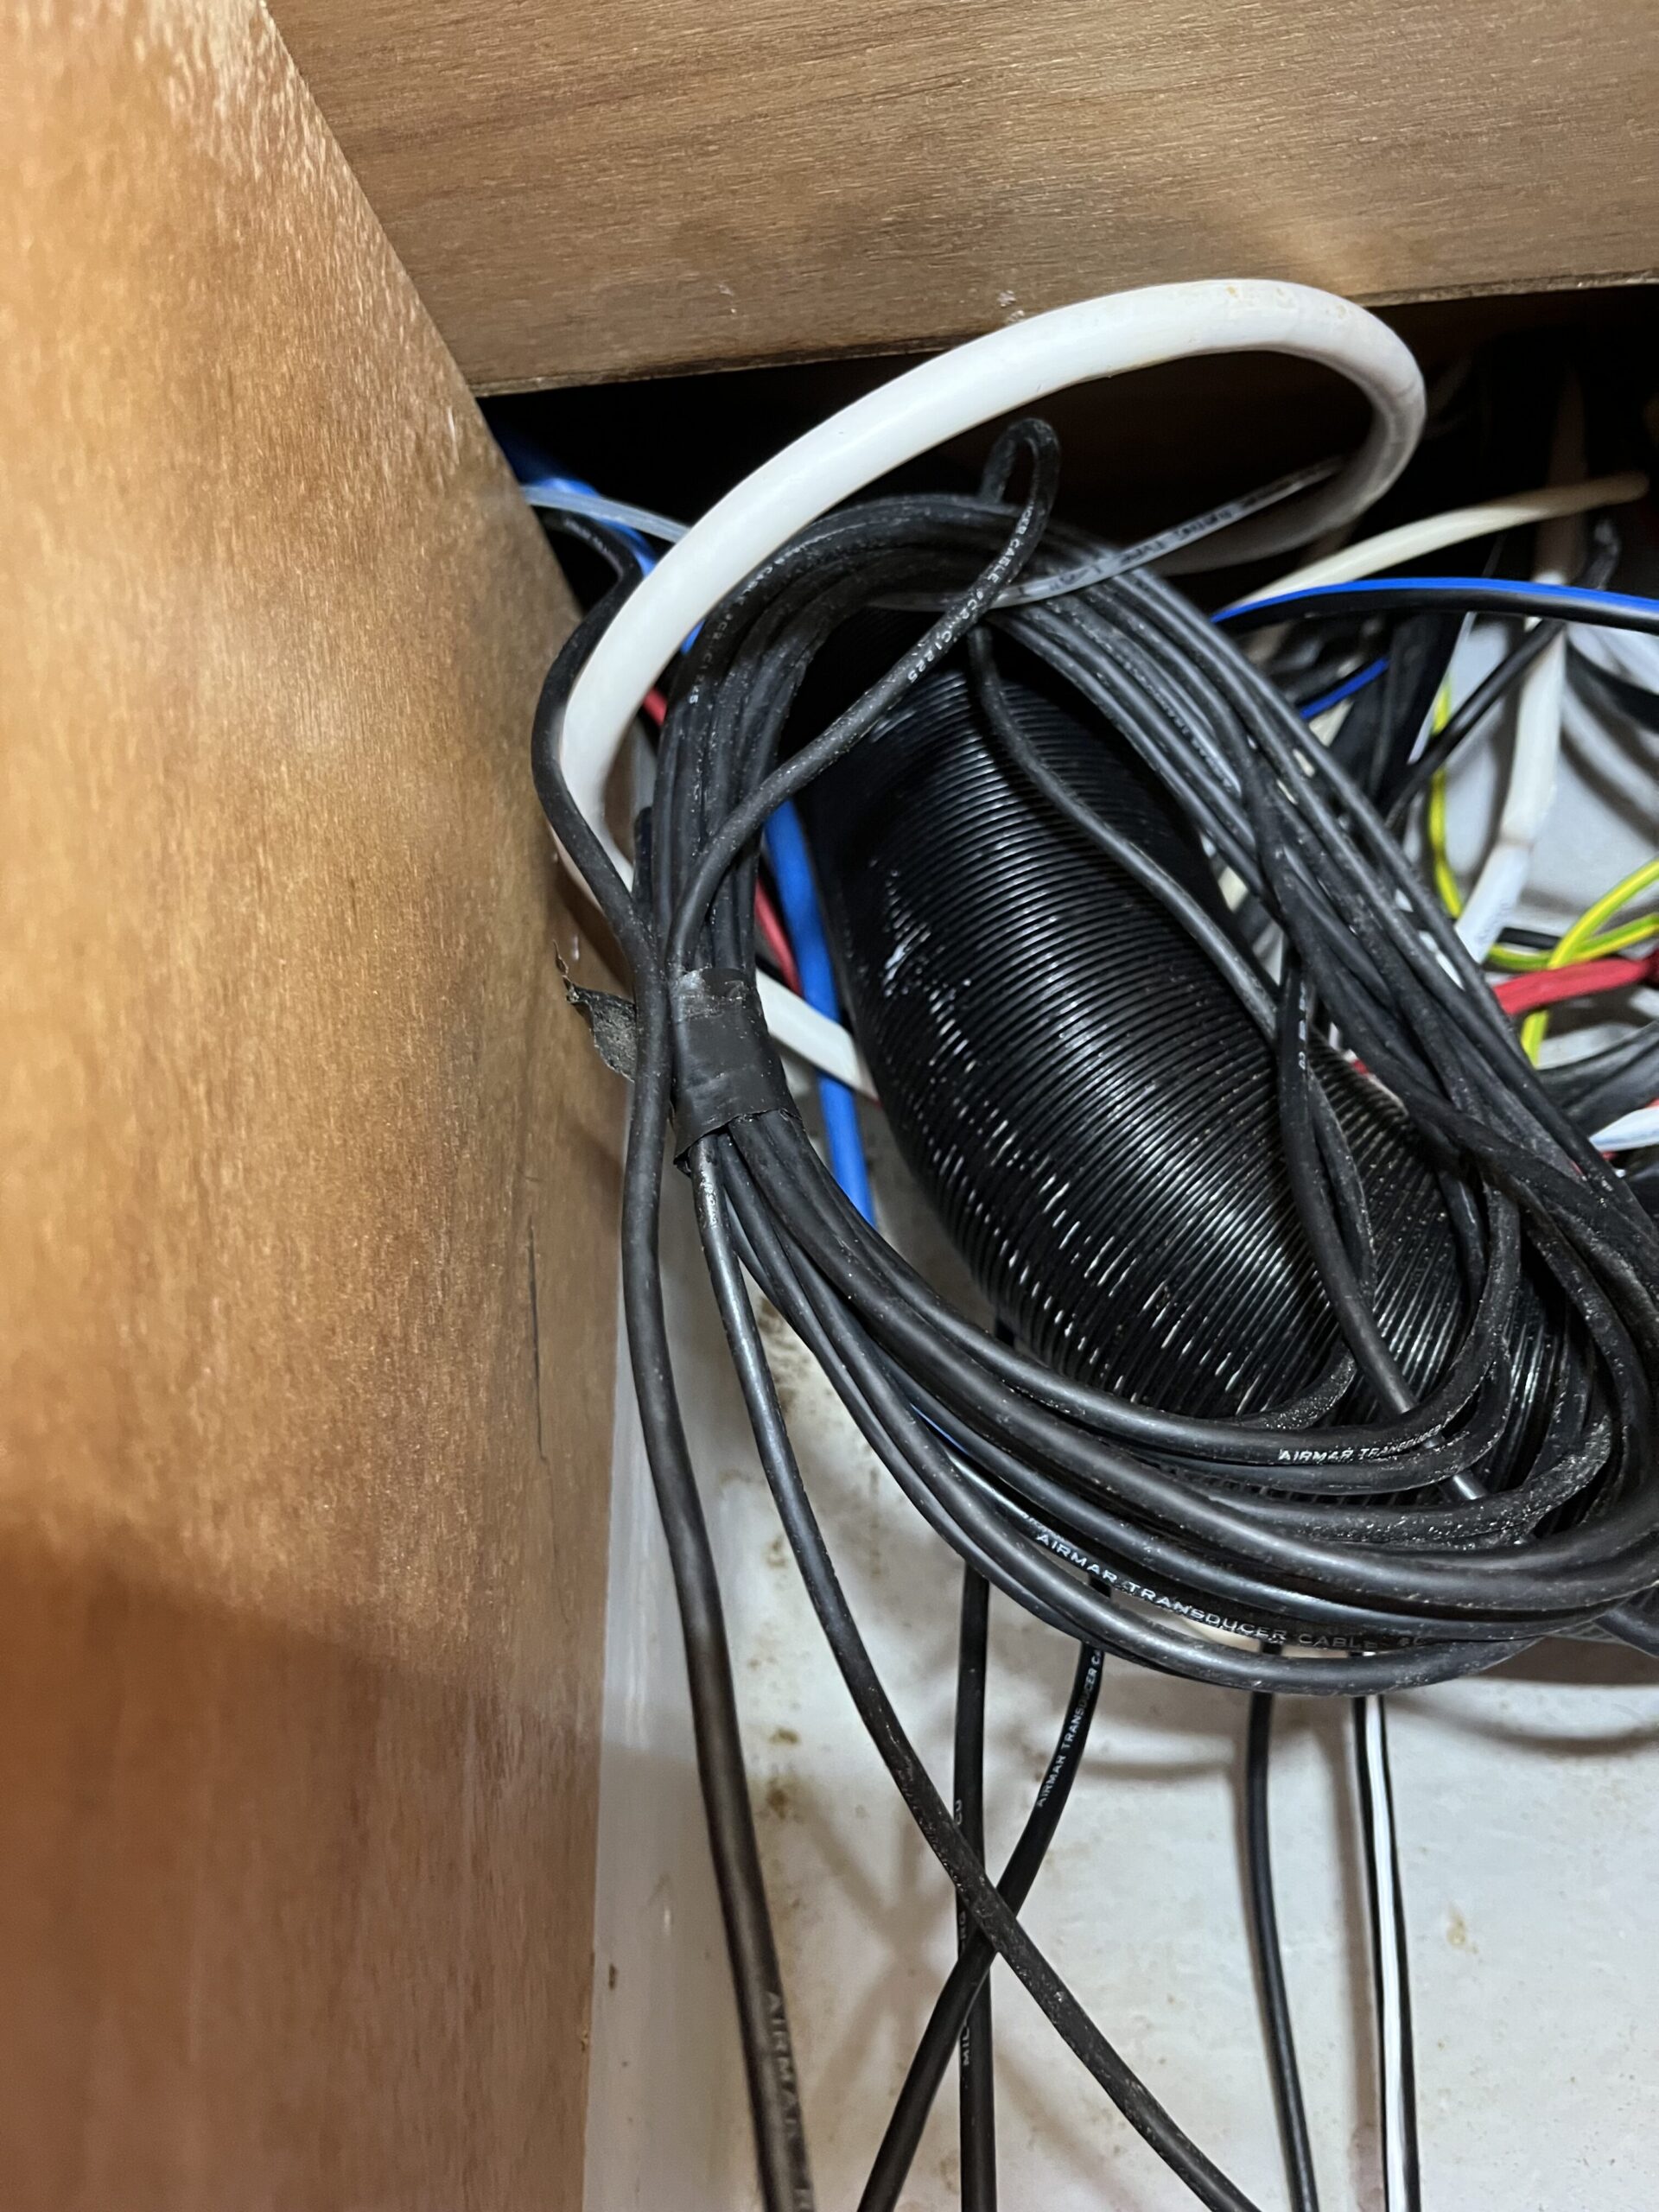
K and I had struggled to get the transducer cables pulled out from the chart table area, and in the end we cut the cabling on the forward bulkhead of the chart table to make progress. During this work, I discovered just why we’d had so much trouble – the cables had been wound up and bound with tape, then dumped behind the chart table out of sight. Worse, one of them had had the pneumatic hose for measuring the quantity of water in the bow tank run through it. Since both ends were already cut off, I just took a pair of cutters to that one and snipped every loop. The other transducer cable was the same, though not entangled, so it just came out in one big bundle. Both went into the trash, as I doubt I’ll be moving the ITC-5 much further aft than it currently is.
Next up, moving the Miniplex-3 from the “deck” of the wiring locker to the forward bulkhead. Had to move the cable loops for the B600S first, and I took the opportunity to bundle up the excess patch antenna cable into the same P-clip. With that done, I could use my impact driver with 30 cm extension bit to drive the #8 screws into the timber – the Miniplex-3 is directly screwed, unlike the B600S and ACU which have the type of fitting where you go over the head of the screw, and then drop down into a smaller slot around the threads. Utter pain, because to my right is the bulkhead for the heads, so bending down and around to see what’s going on is a bit tricky.
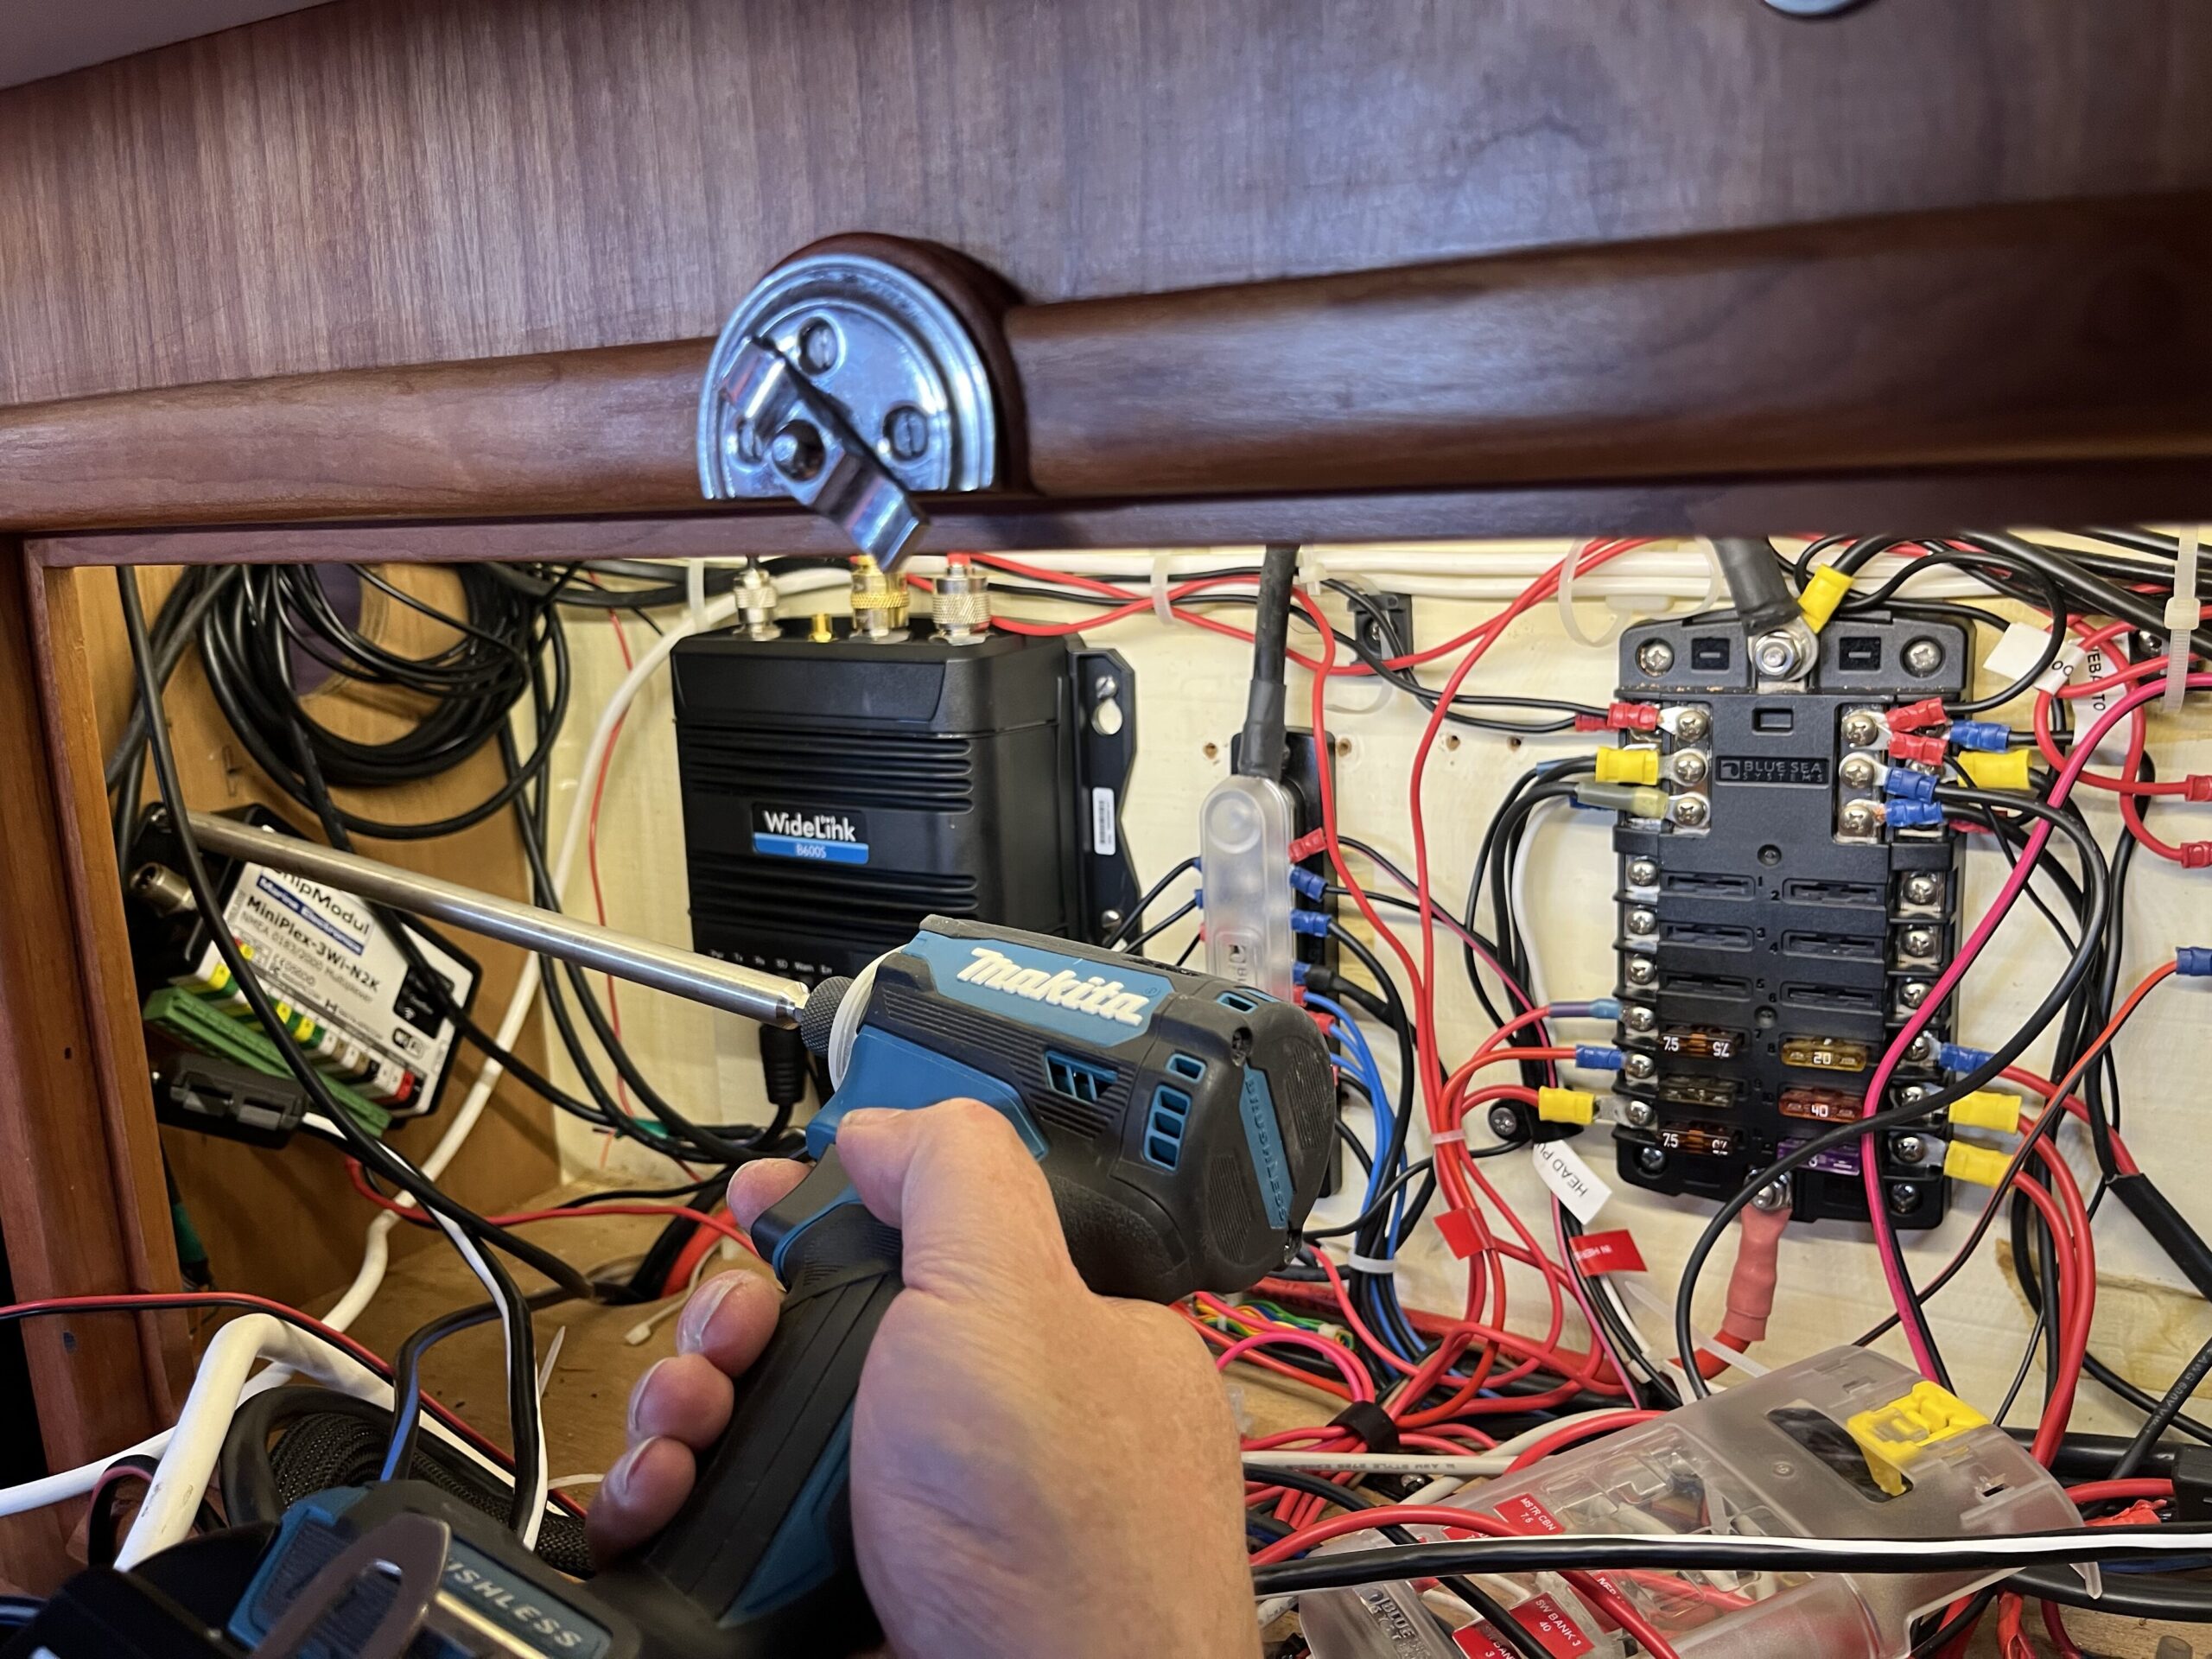
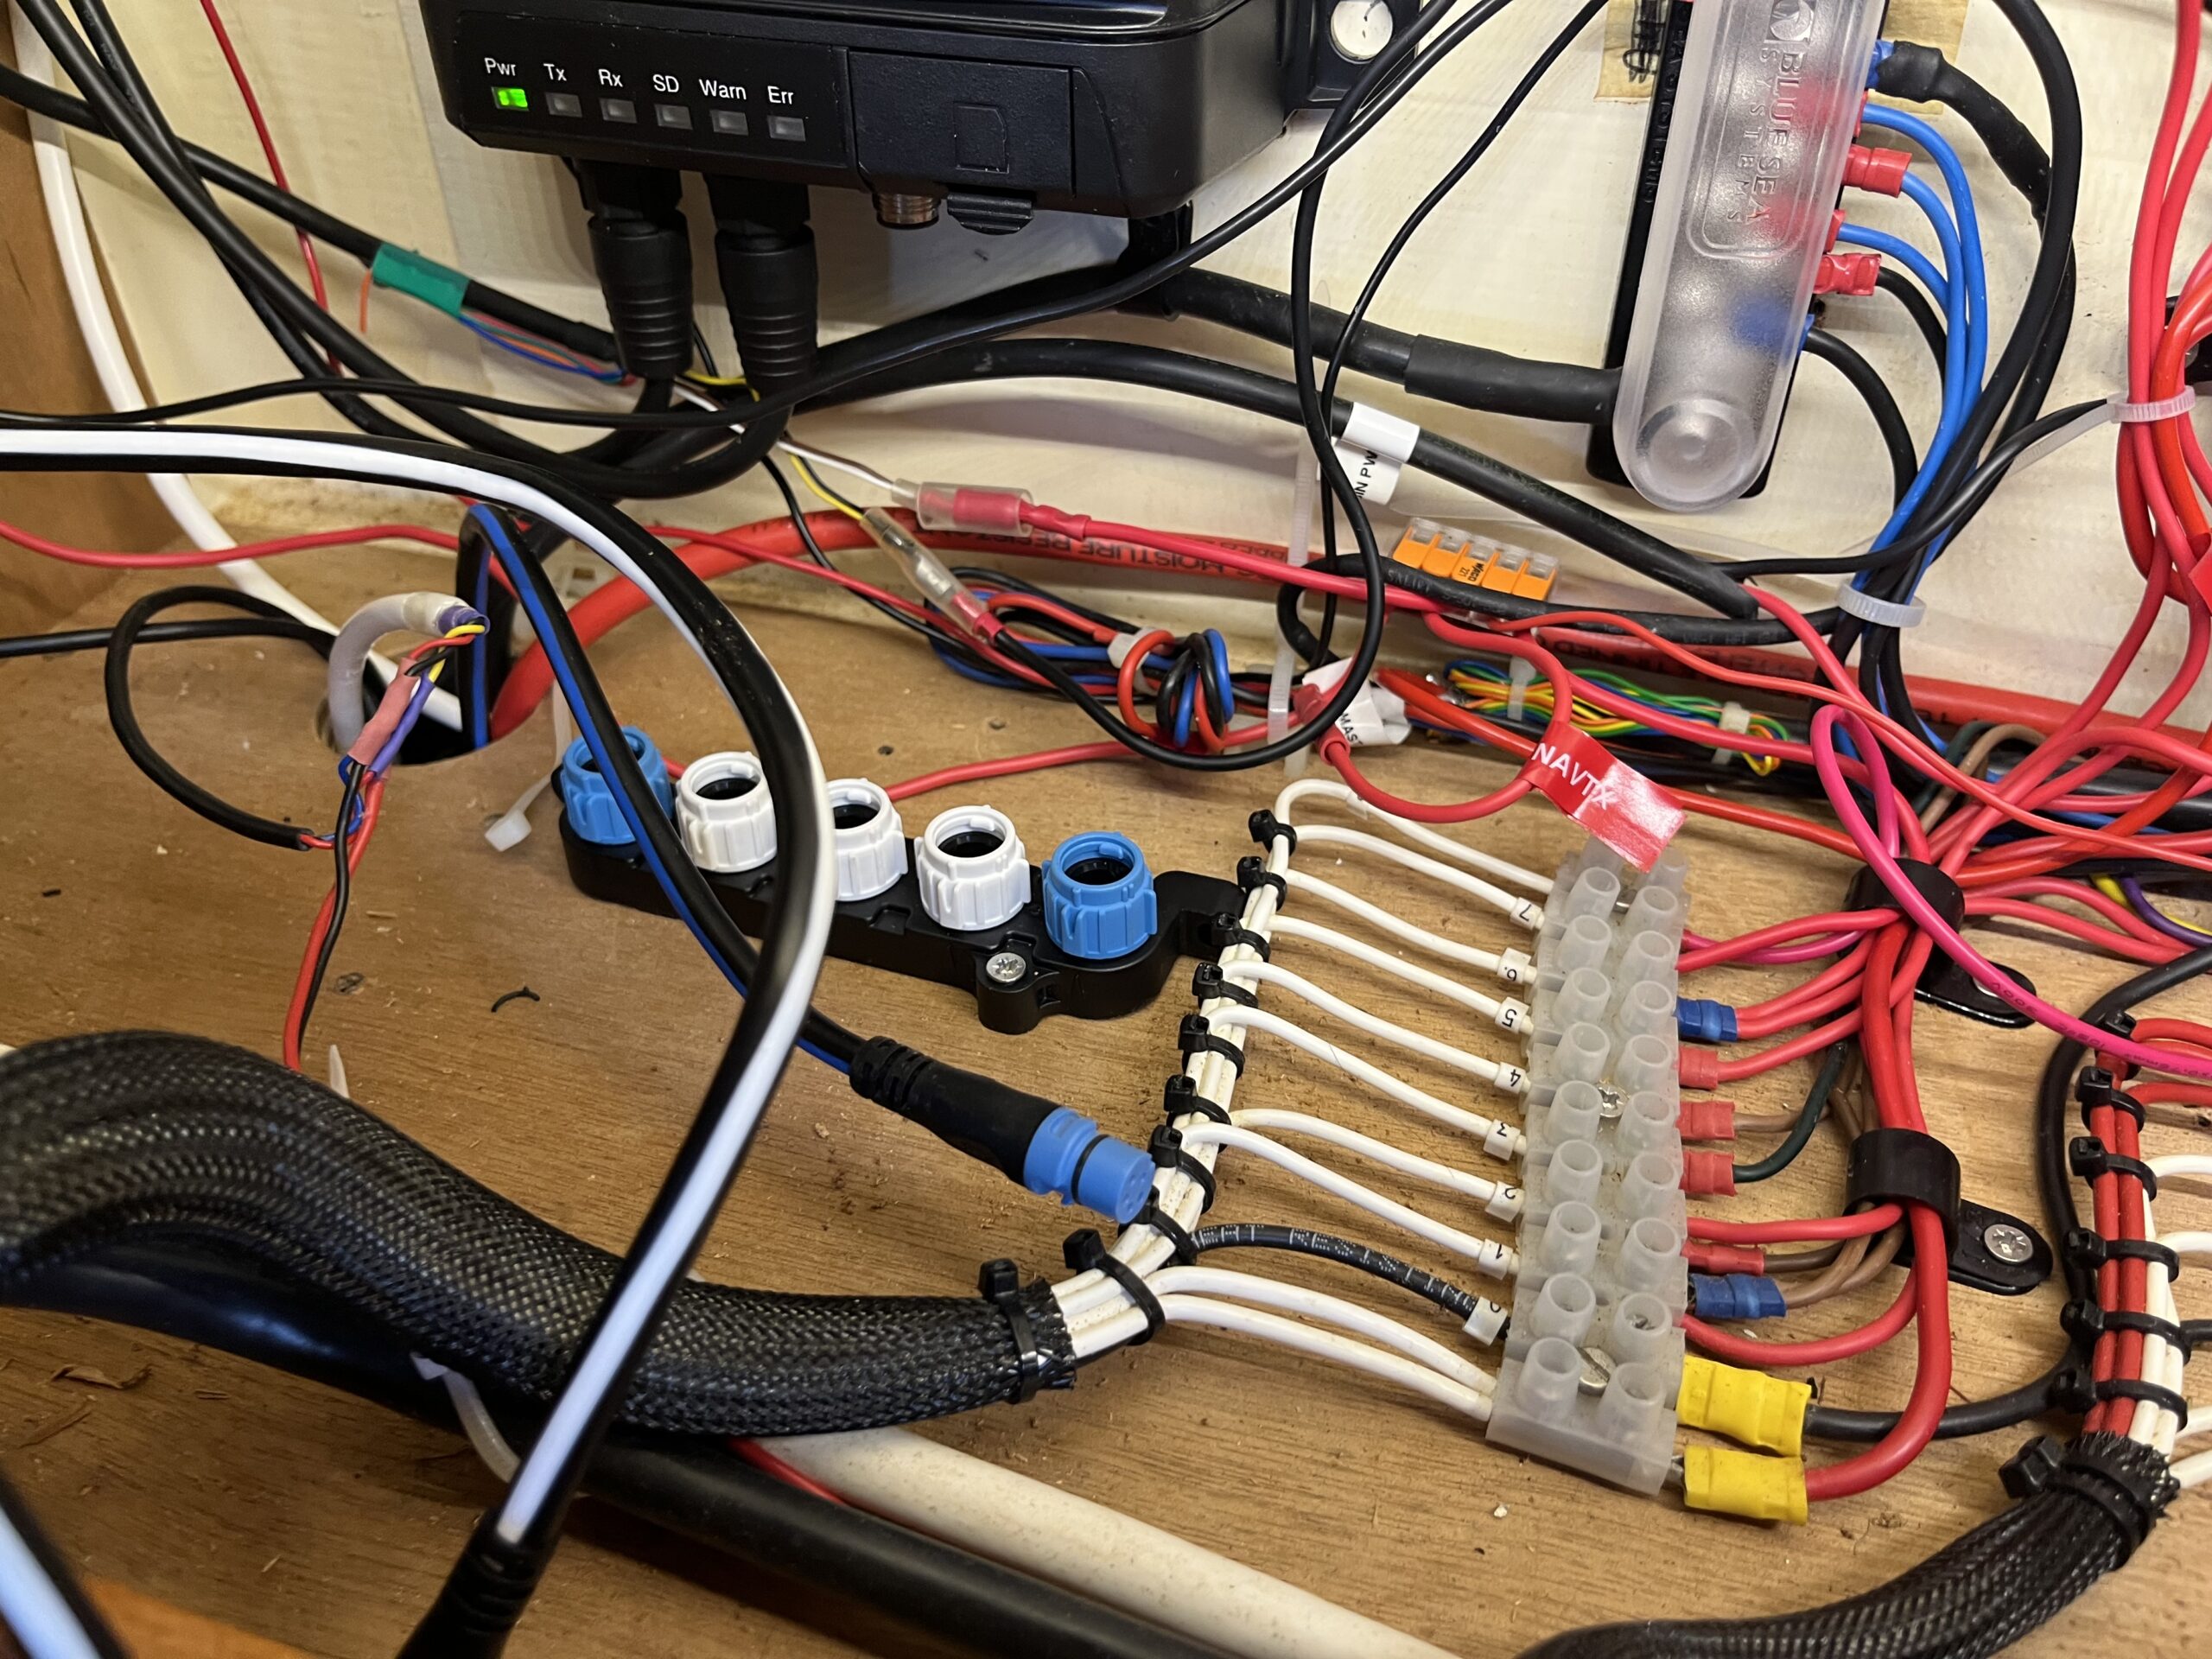
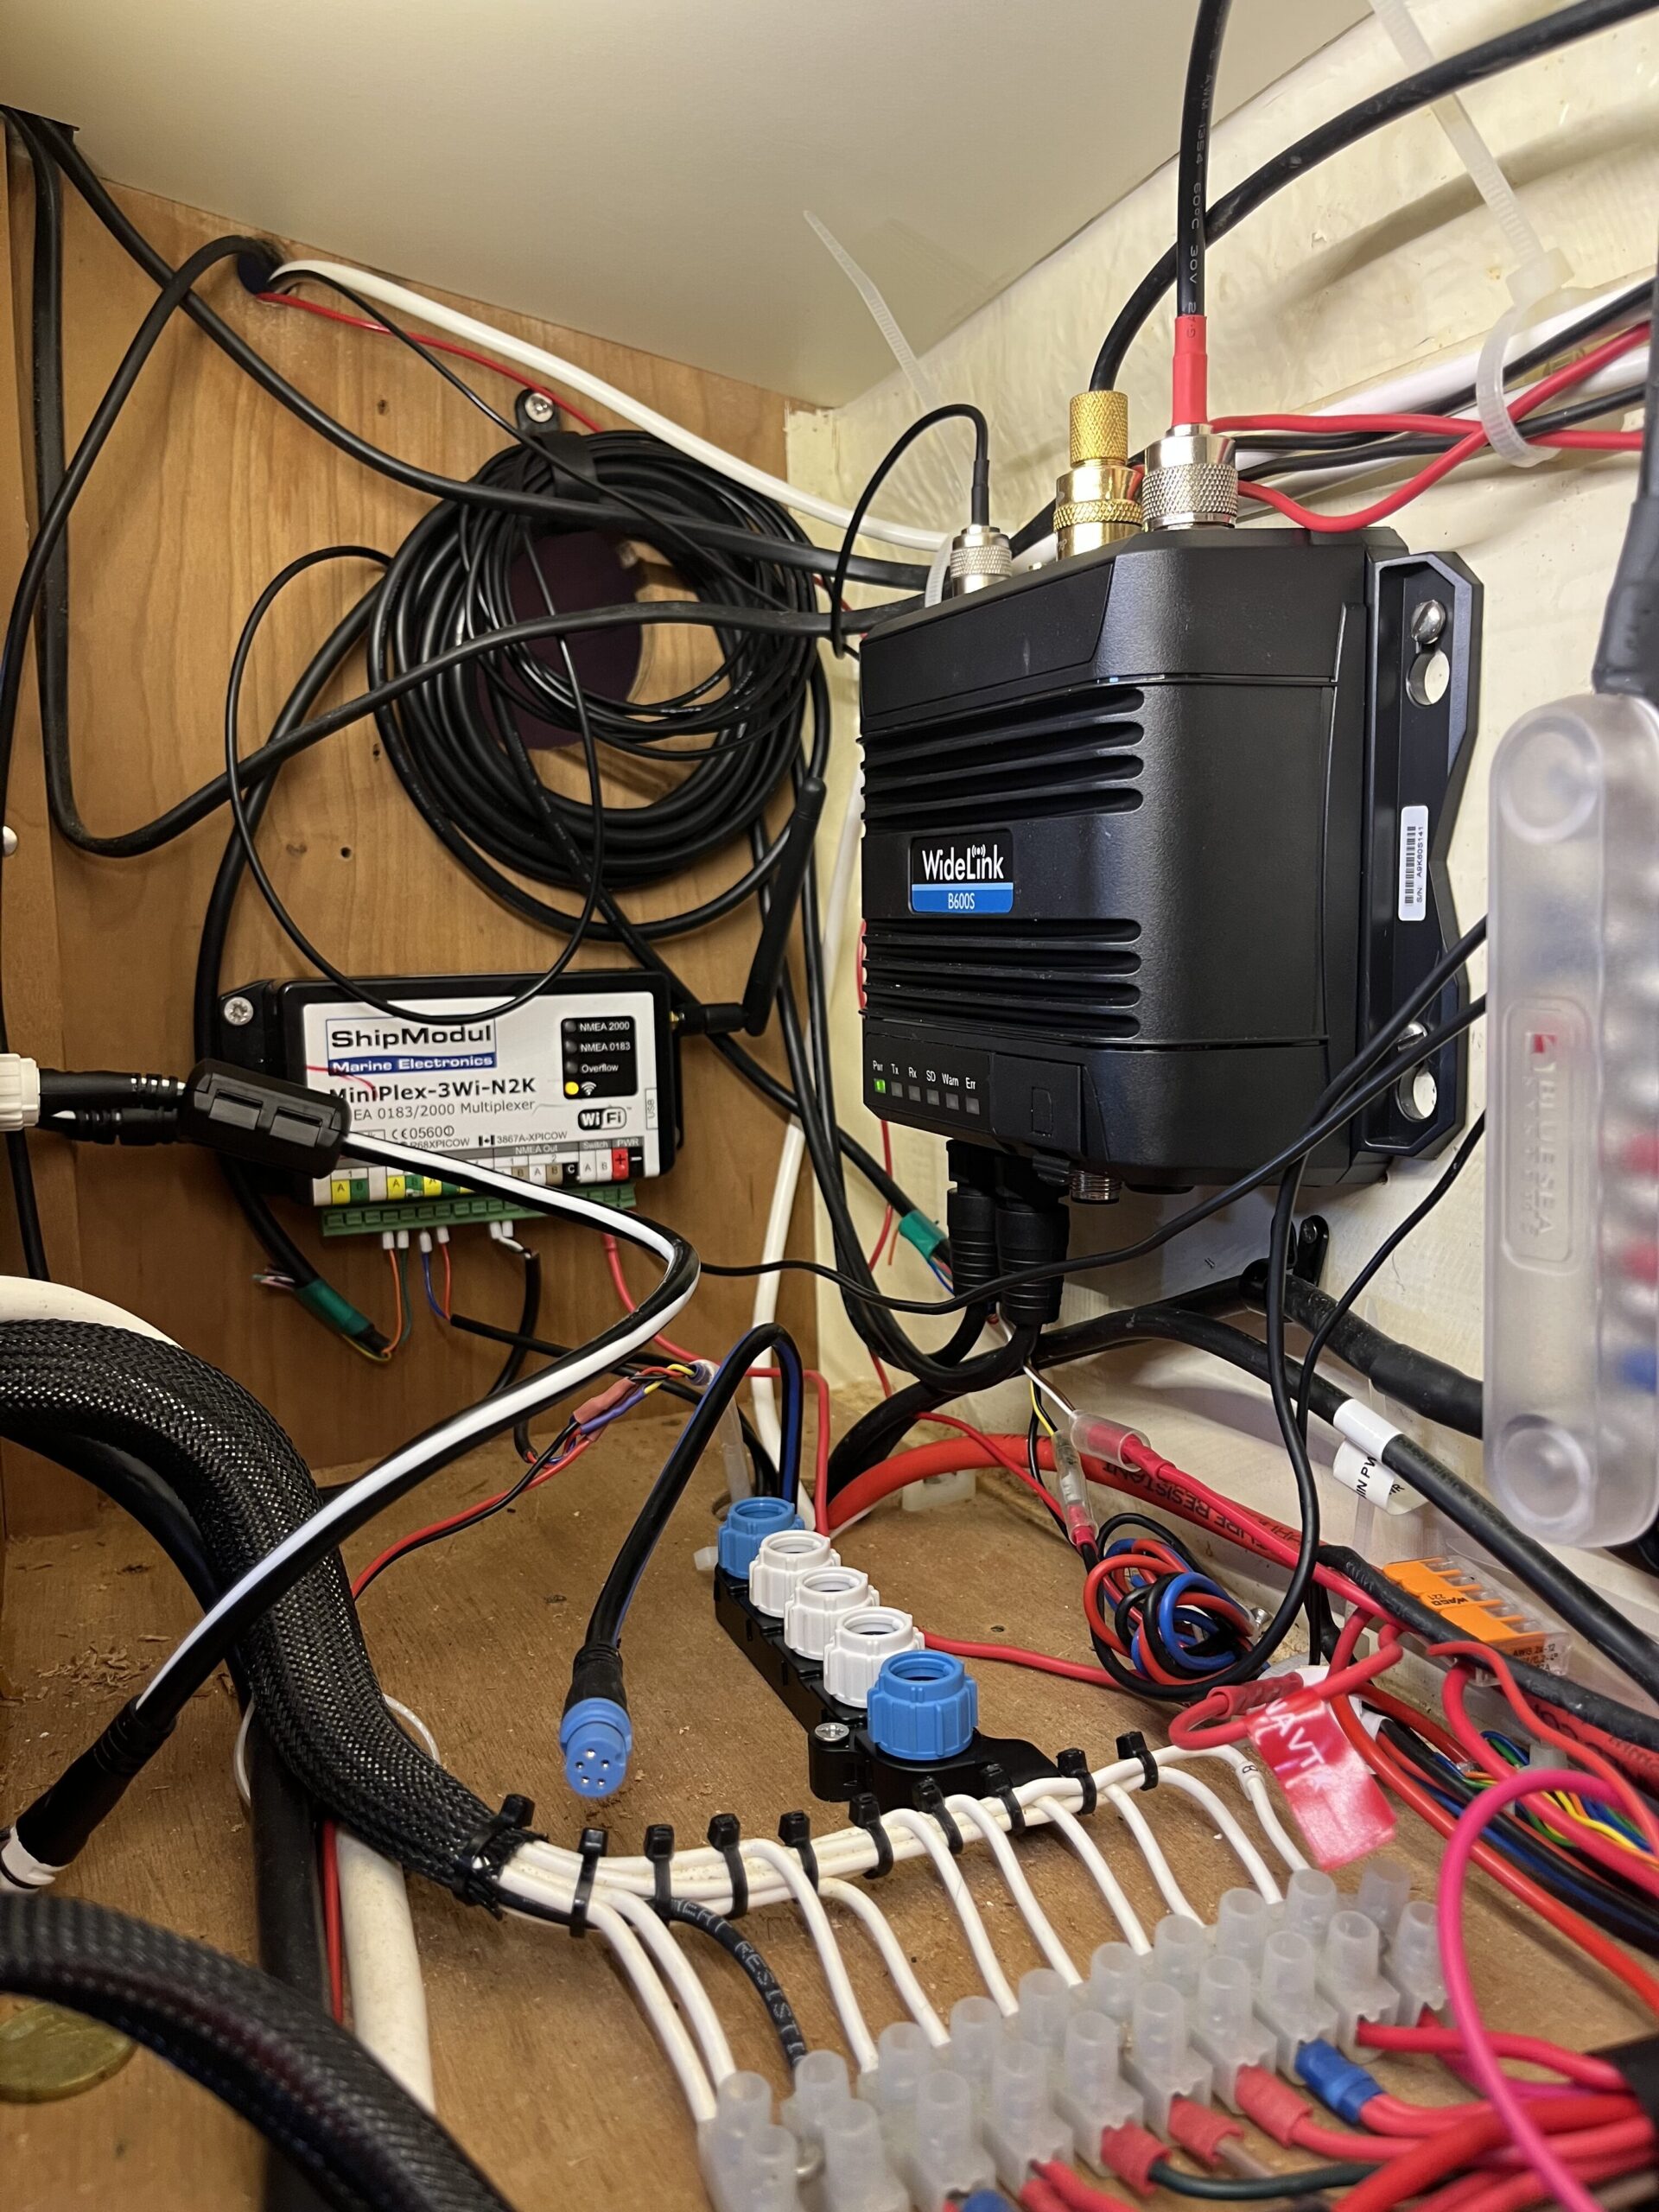
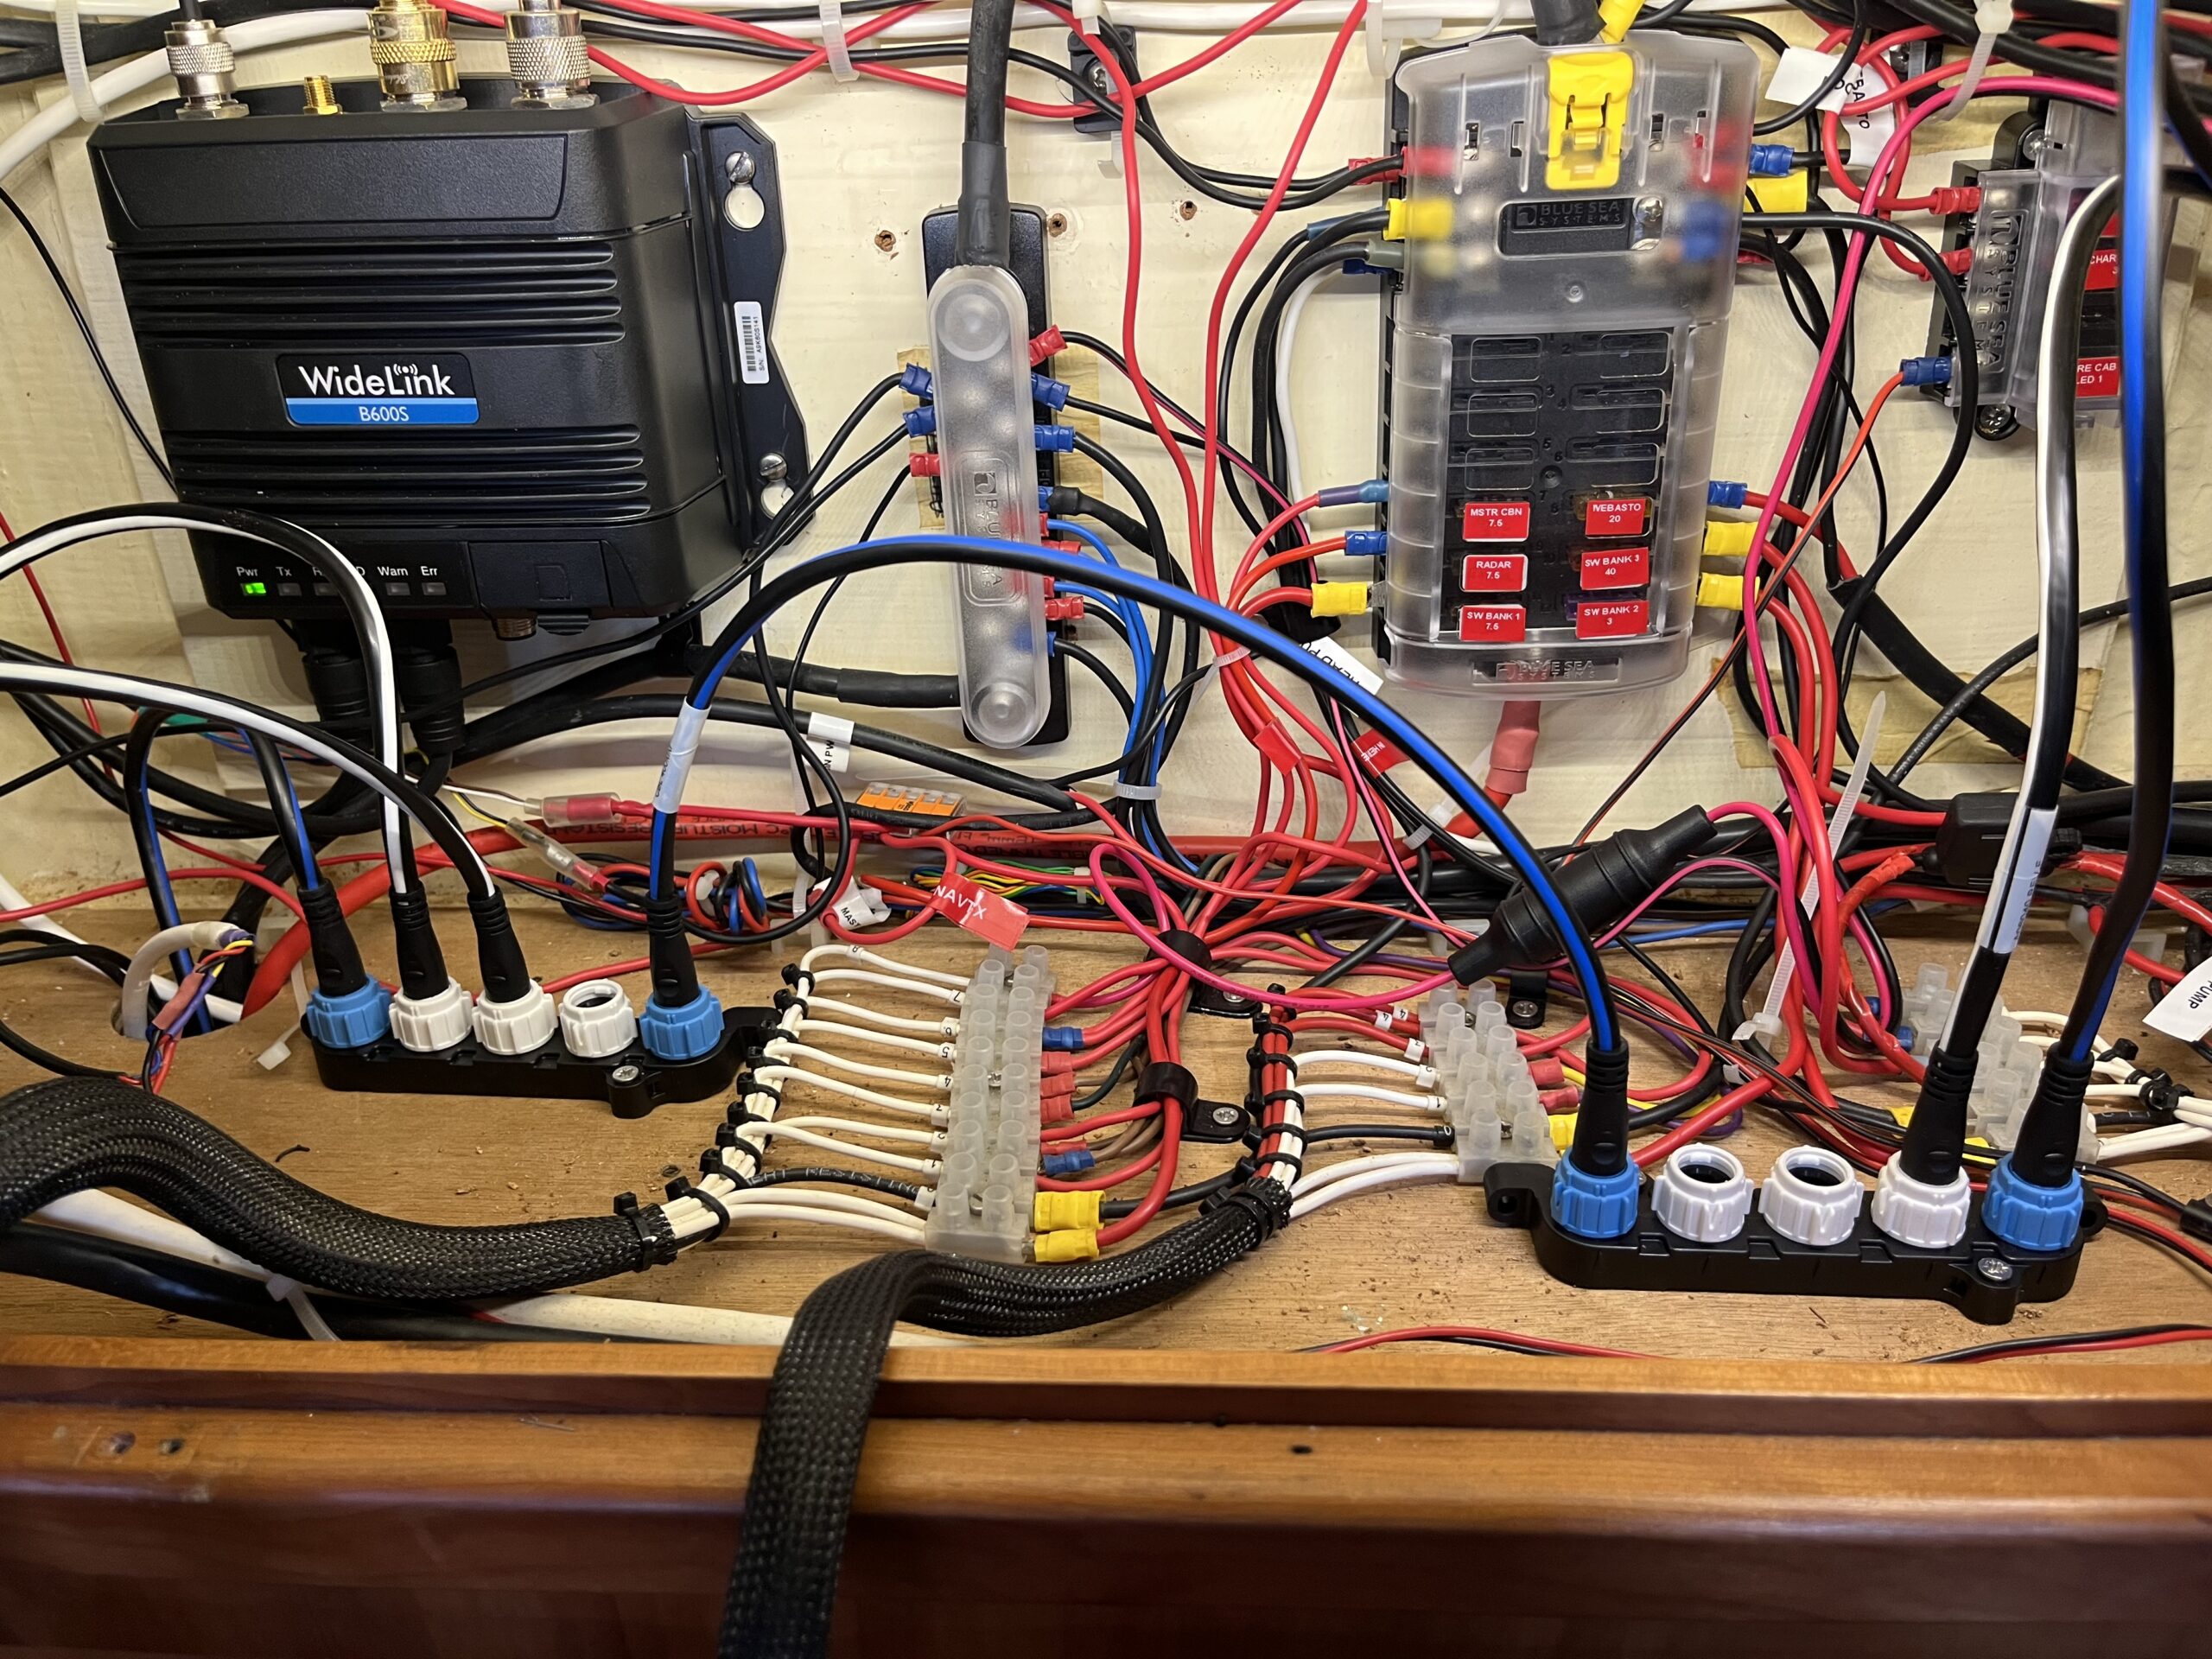
The old SeaTalk1 bus splitter needed to be pulled out during this work, and that necessitated taking the B600S off of the bulkhead to get access to the screws. Impact driver made short work of getting them out – regular screwdriver was awkward to operate. As with the work in the bow locker, the 2Ah battery would have been really useful in this confined space. Looking at the photo of stern to bow, I need to move two power cables up to the top, above the P-clip for the B600S’s cable bundles, just for neatness. I should also check how thick the laminate-covered wood is, because perhaps I can move some cable routing up there out of the way completely.
With the bus splitters in place, it was time to add the power cable to supply power to the instruments. I wanted to keep the current design, where I can bring up the instruments without the autohelm; power draw will be lower, and if all I need is wind, depth, and speed, I don’t see the point in expending power on the ACU-200, linear drive, and Axiom. The EV-1 (course computer) comes up as part of the instrument power, but eh.
The power cabling for the bus requires three connections – positive, negative, ground. Since the negative is tied to ground on Blue Opal, I opted to do a joined ground wire and negative wire into a single bootlace ferrule, with heatshrink to stop the ground wire from accidentally touching anything else, like a falling positive wire.
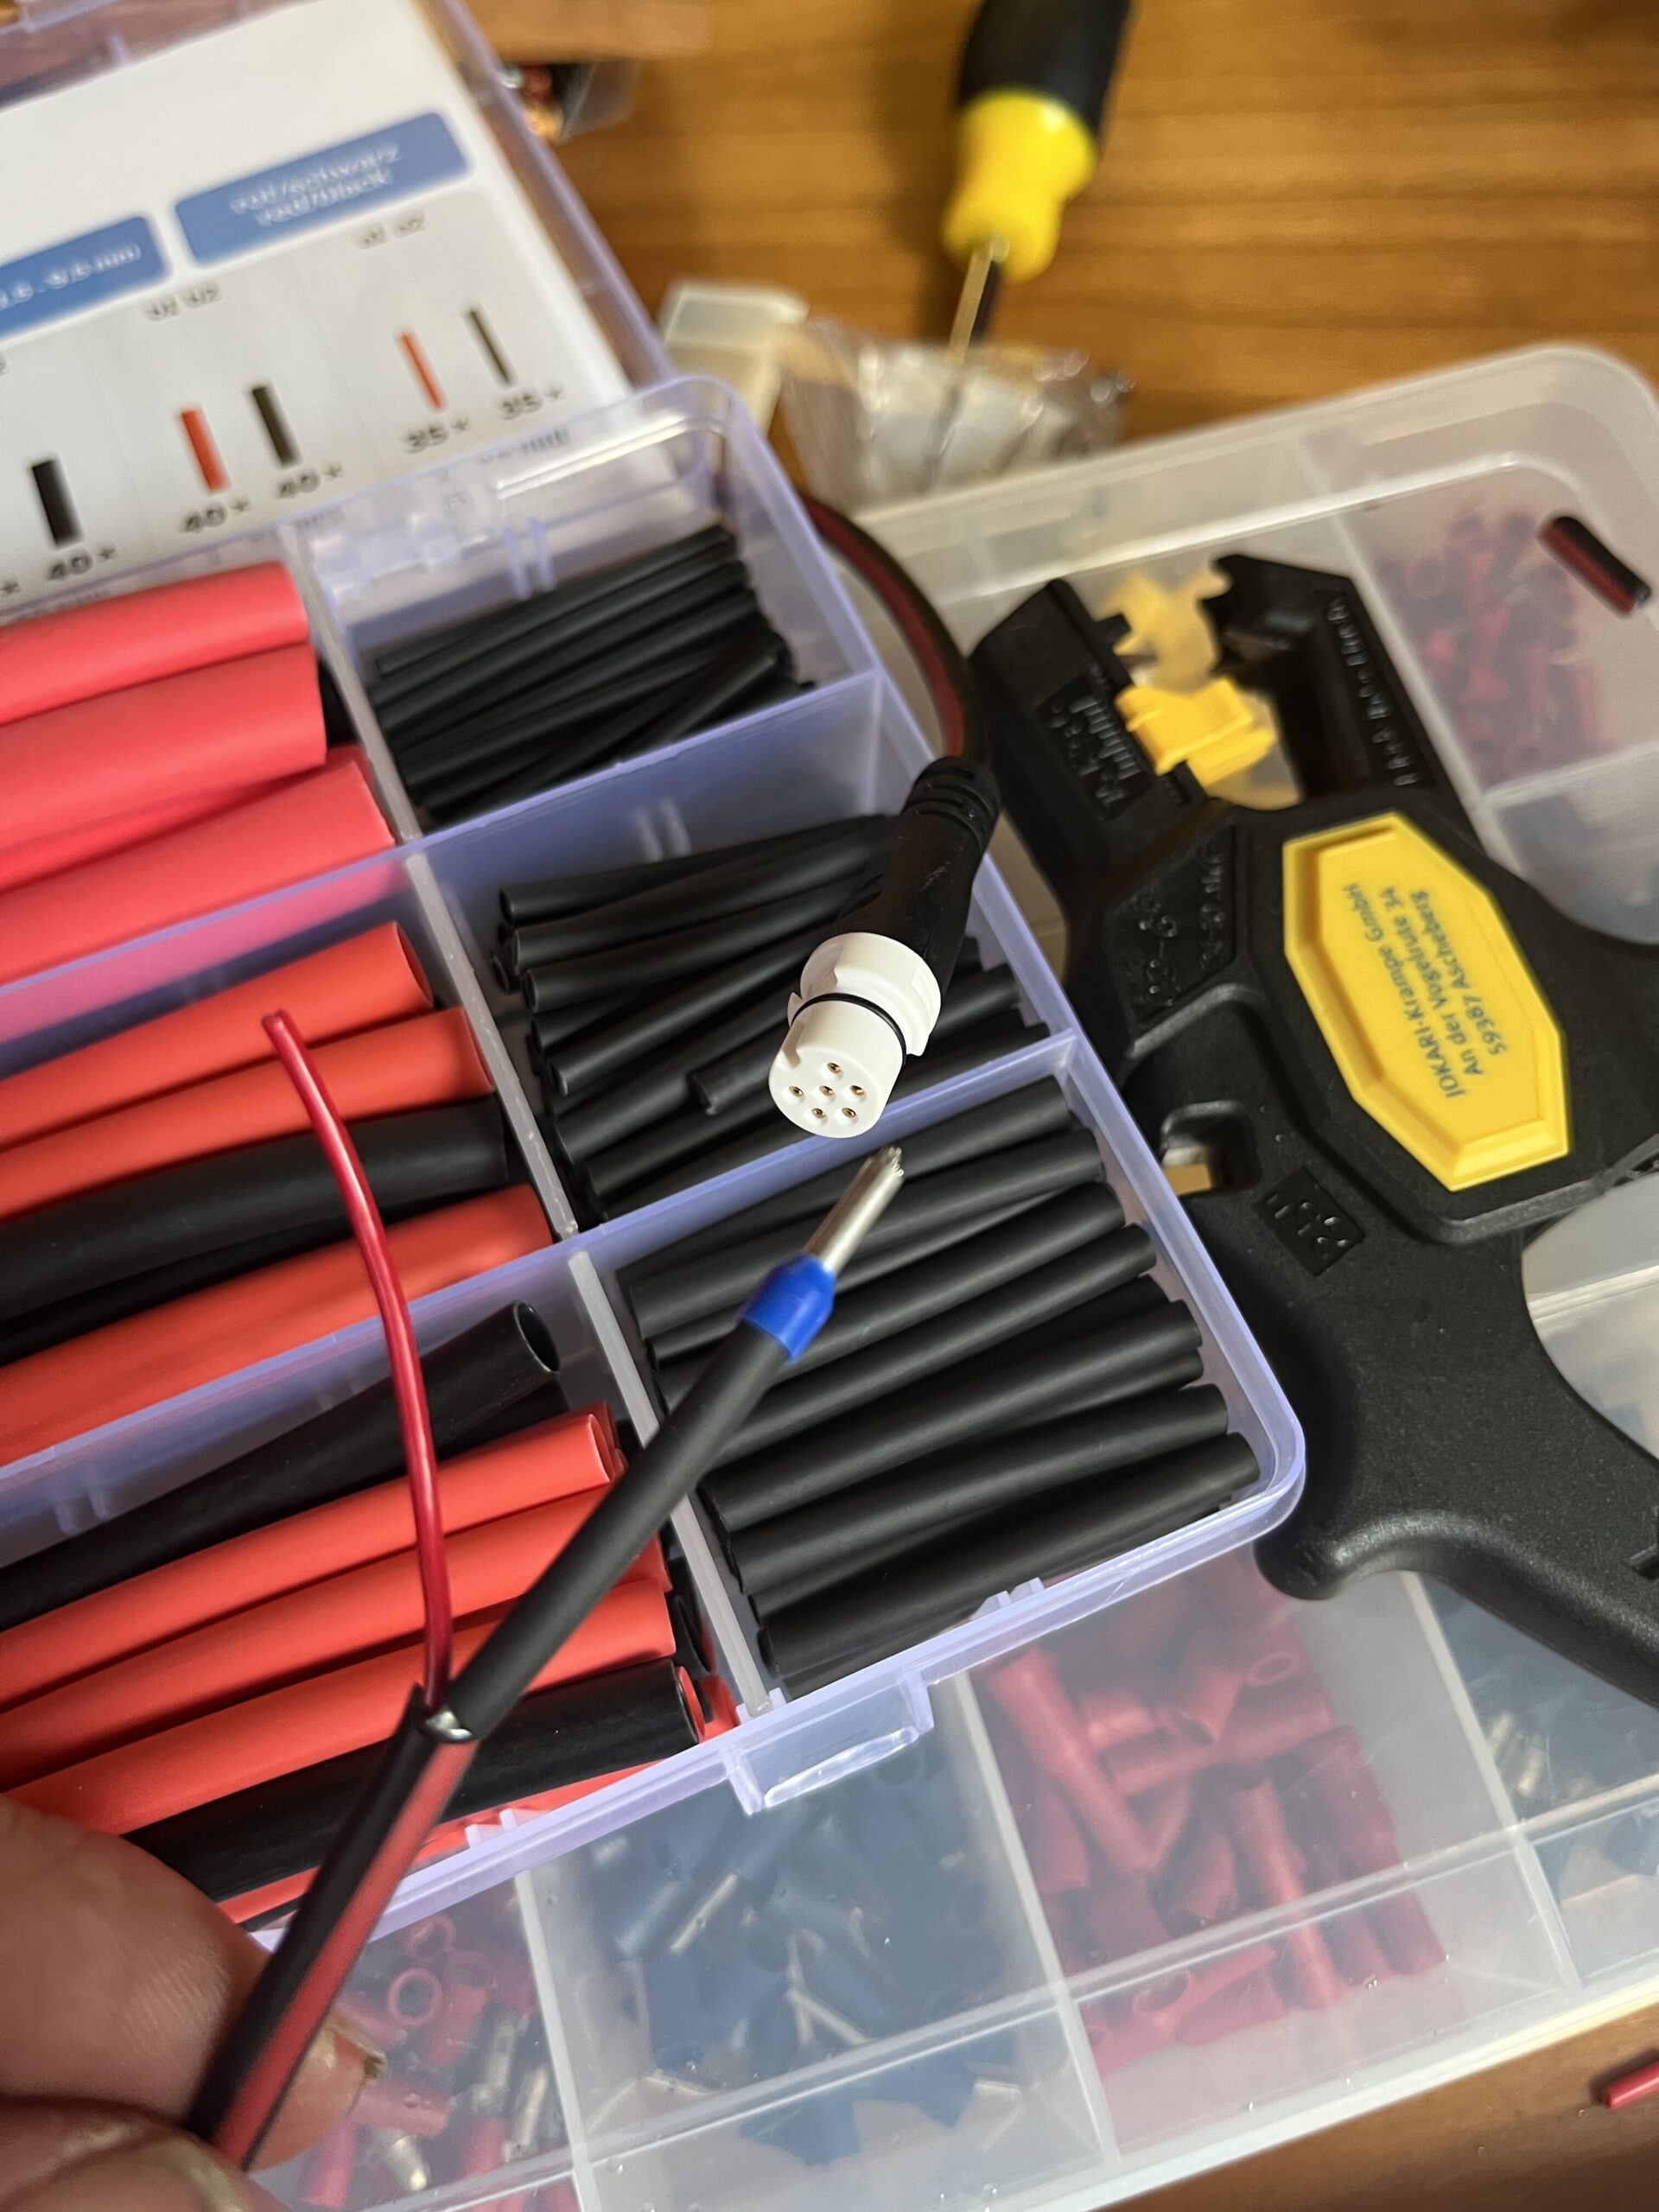
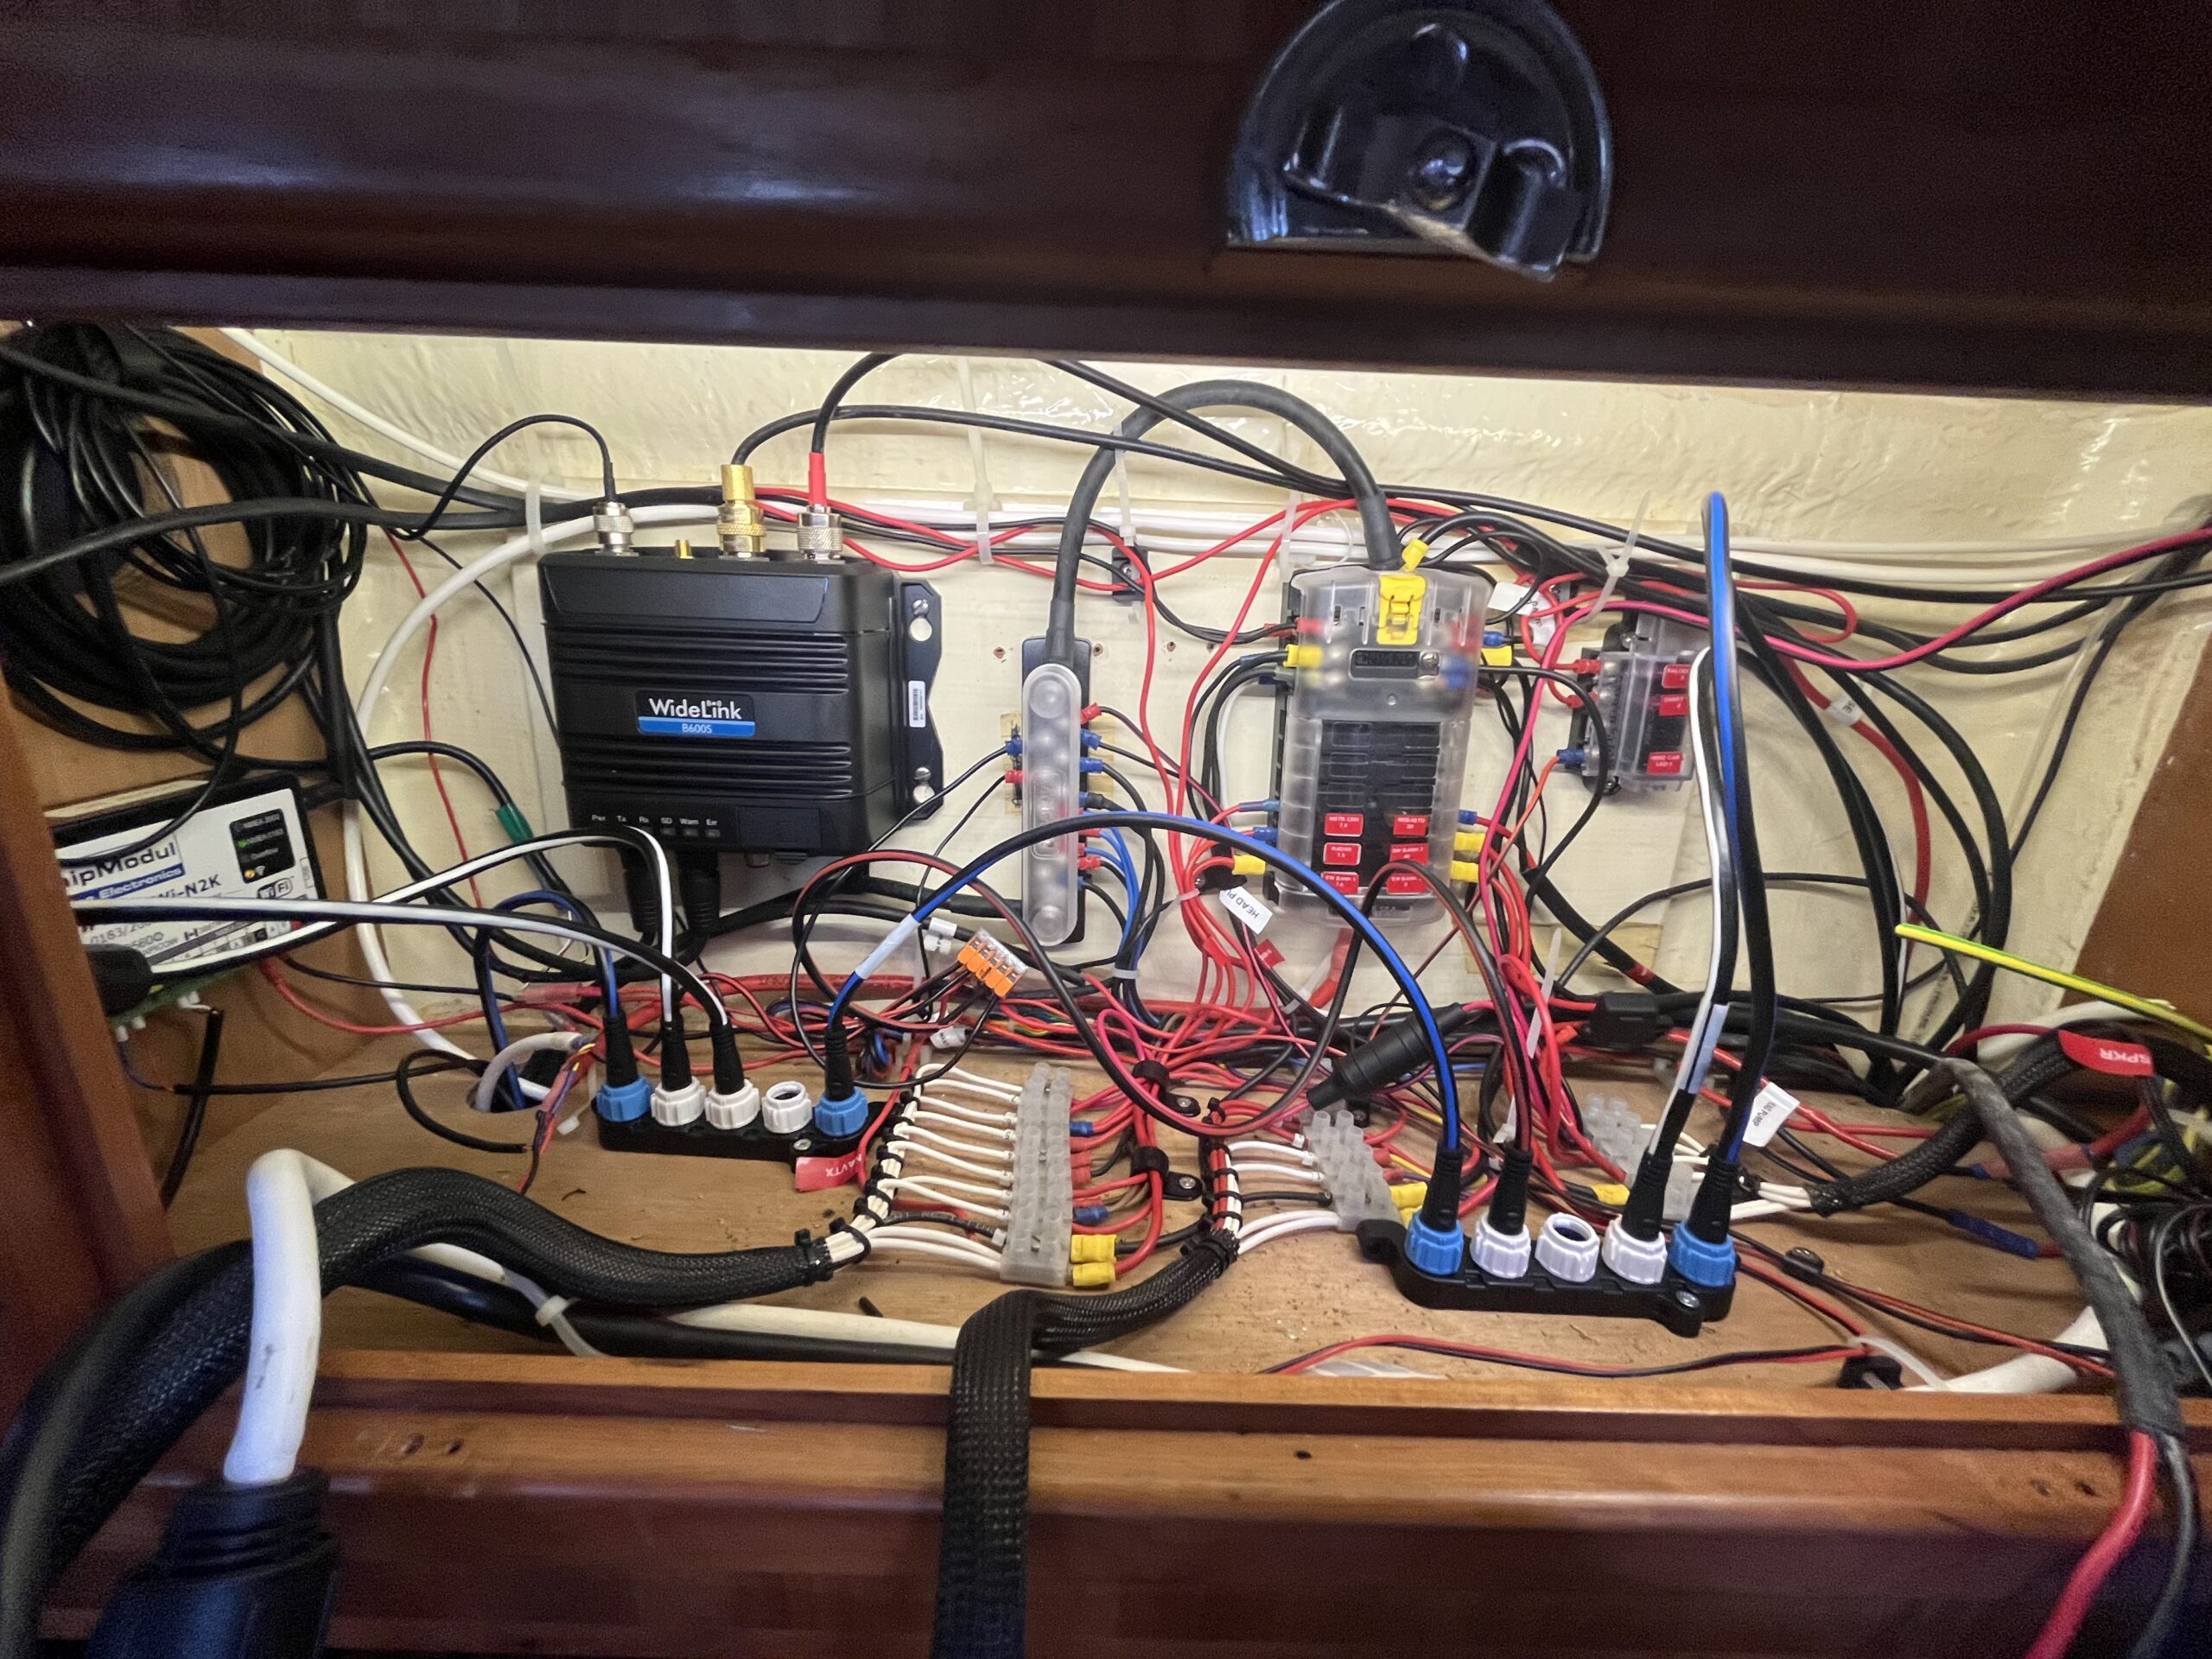
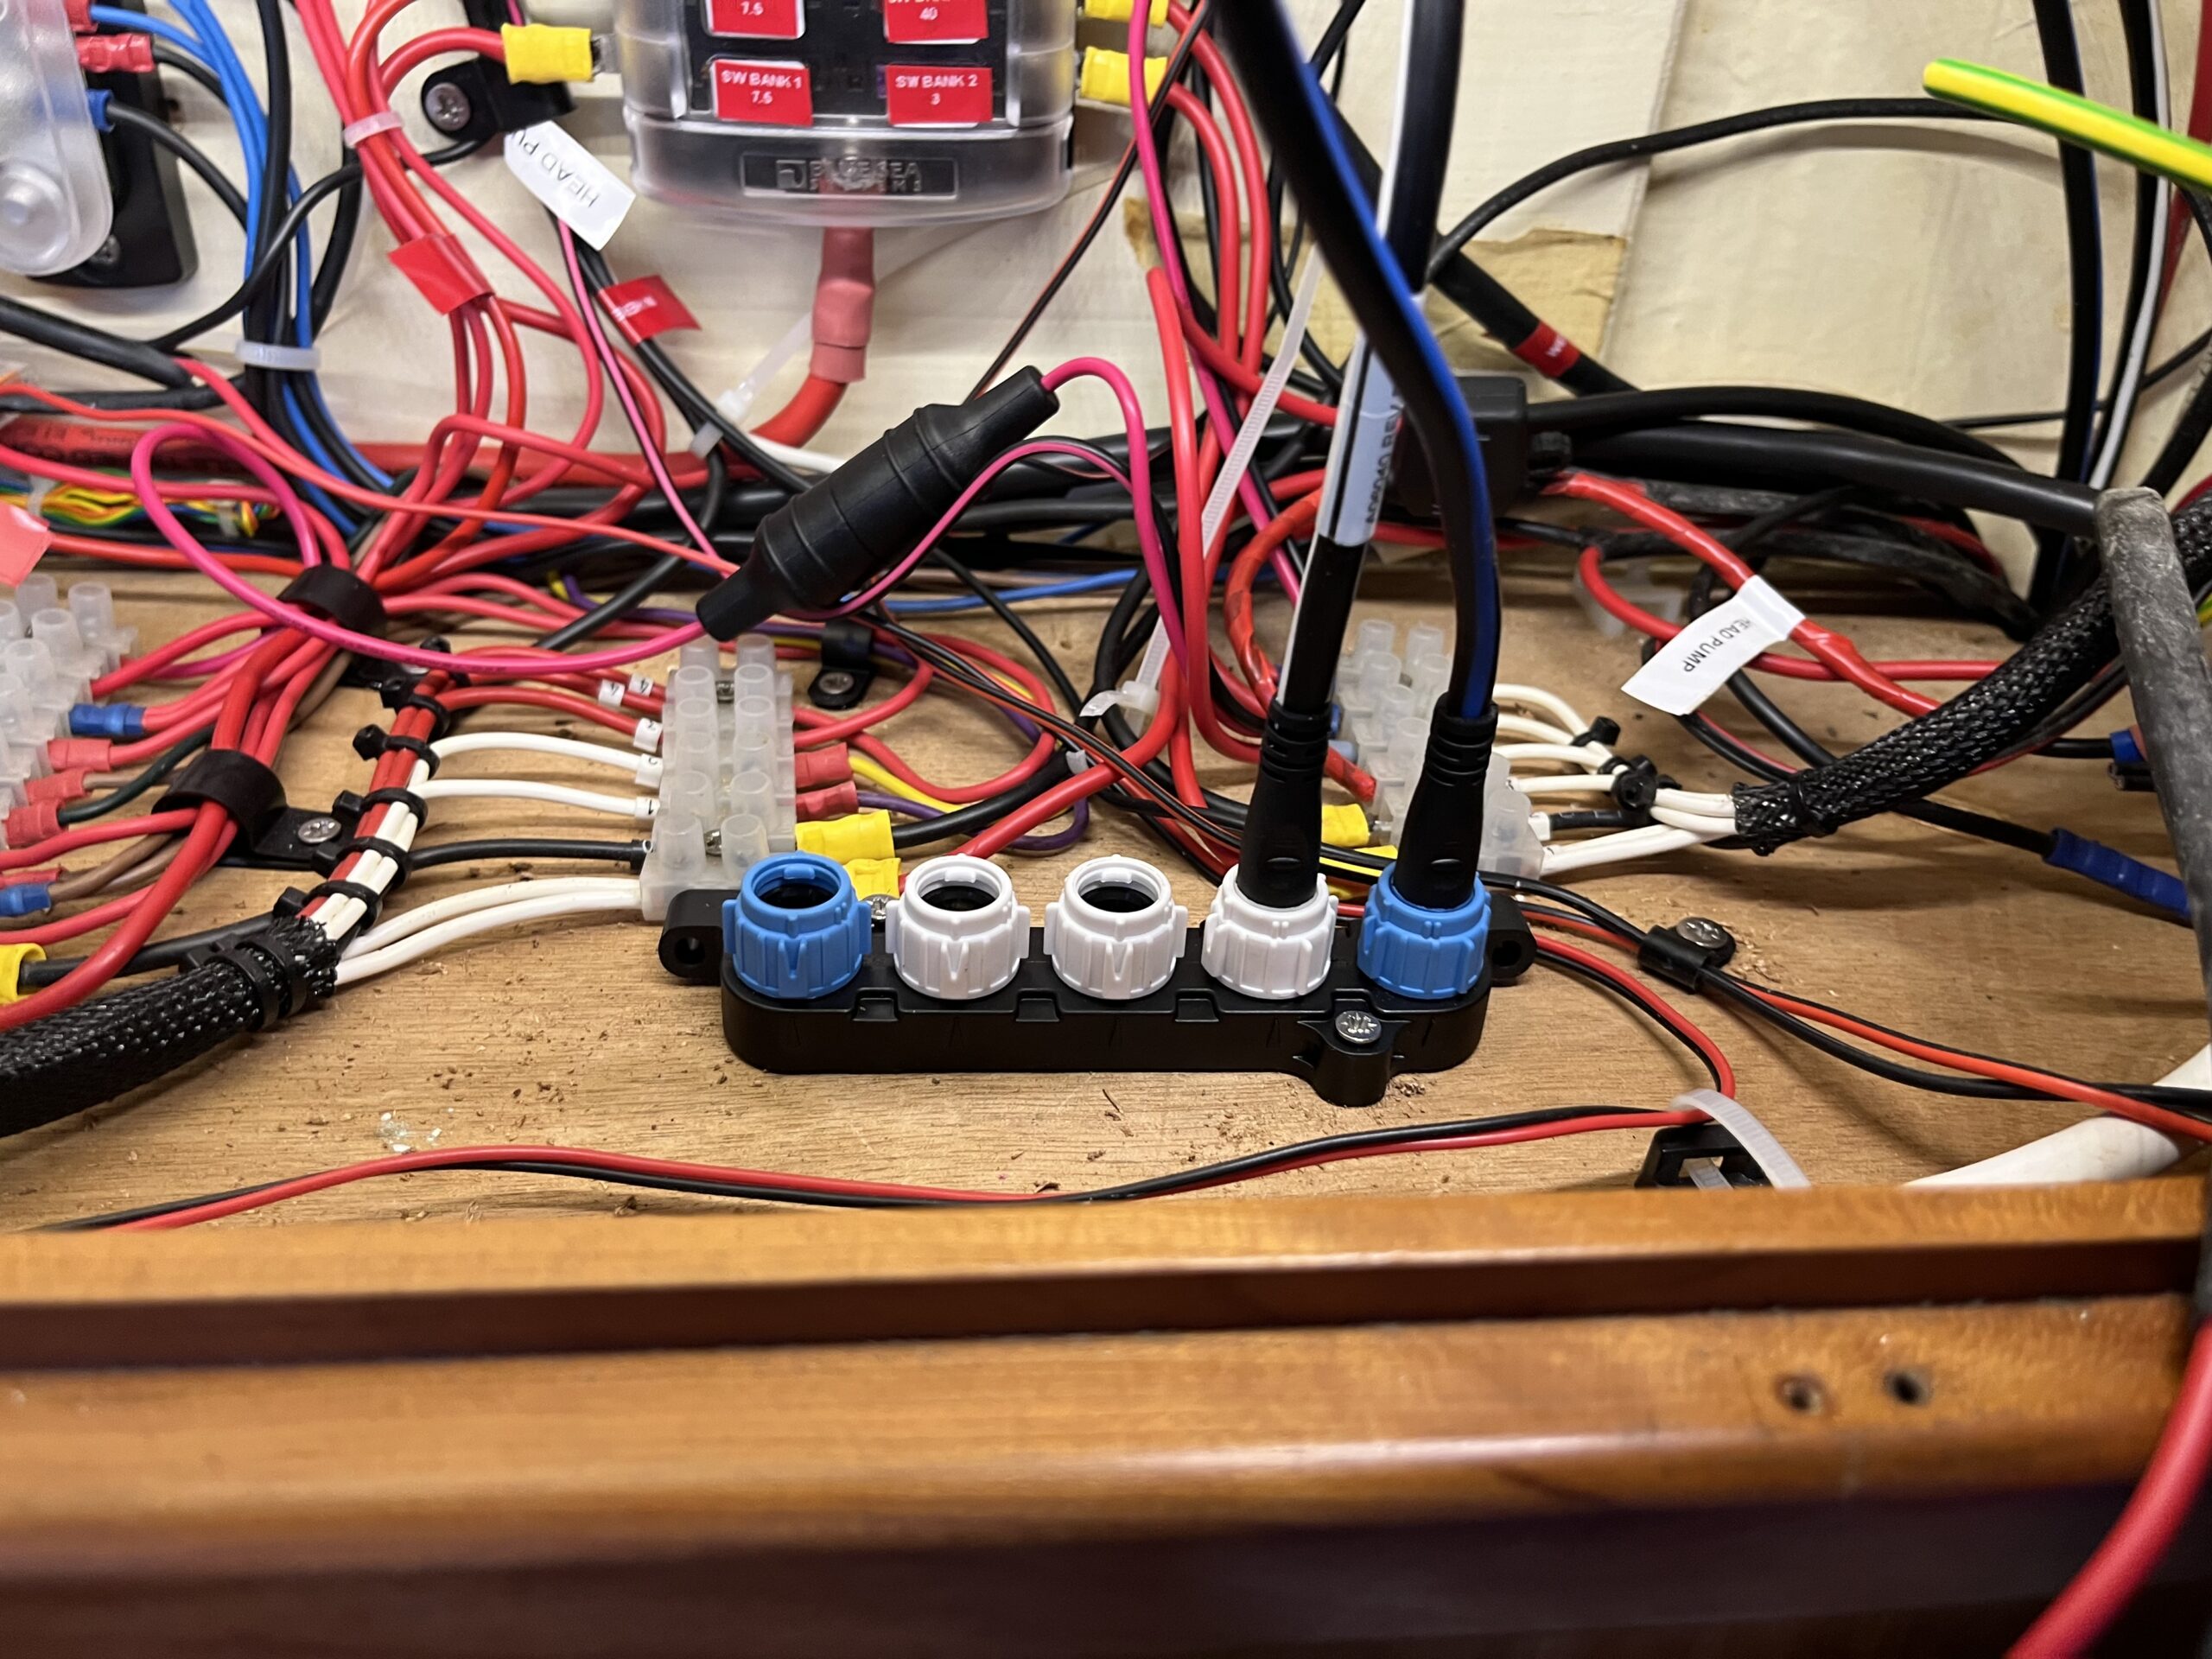
In this case, I used a bootlace because the connector is going in to a Wago 5-way block. I’ve found the mounting brackets for the Wagos, so on another trip I’ll mount them to the wooden panel that everything else is mounted to. I also moved the small always-on fuse block aft, to the edge of the panel, and then moved the bigger 12-way fuse block aftwards as well. Could really use a larger panel some days, as it’s a pretty constrained space to fit all of the wiring. Not shown in any of the photos – the state after I vacuumed up all the wood detritus.

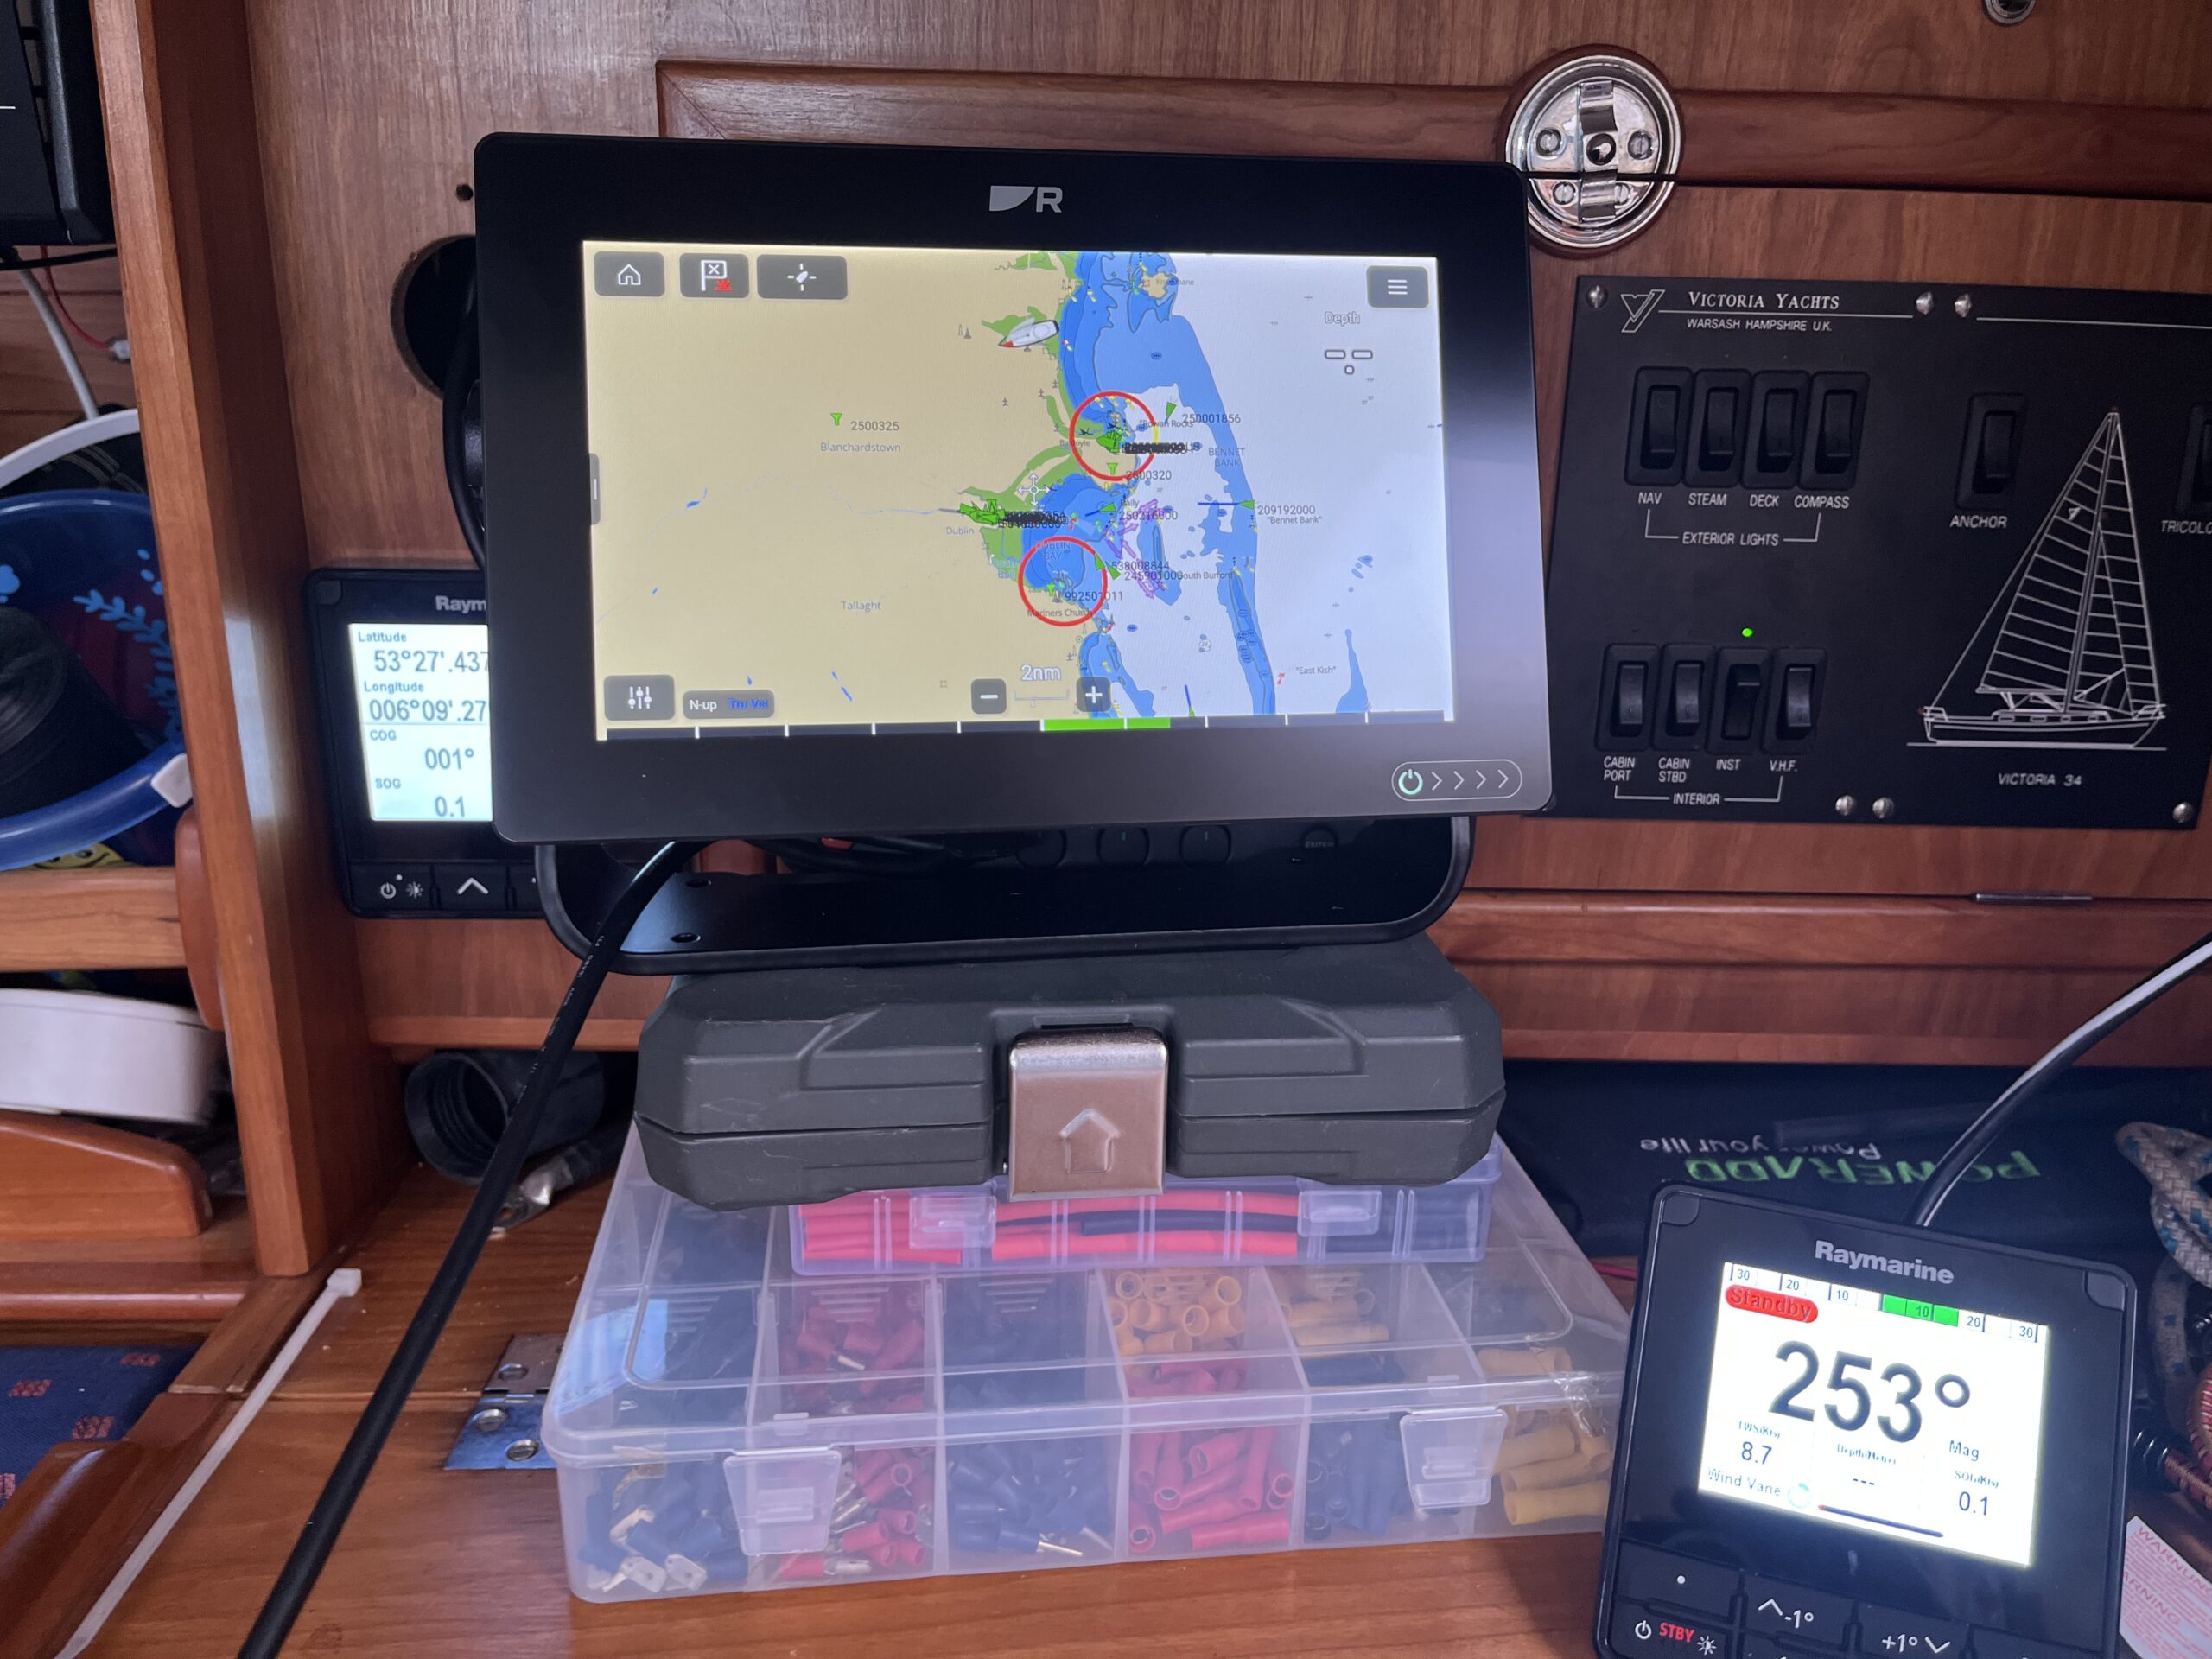

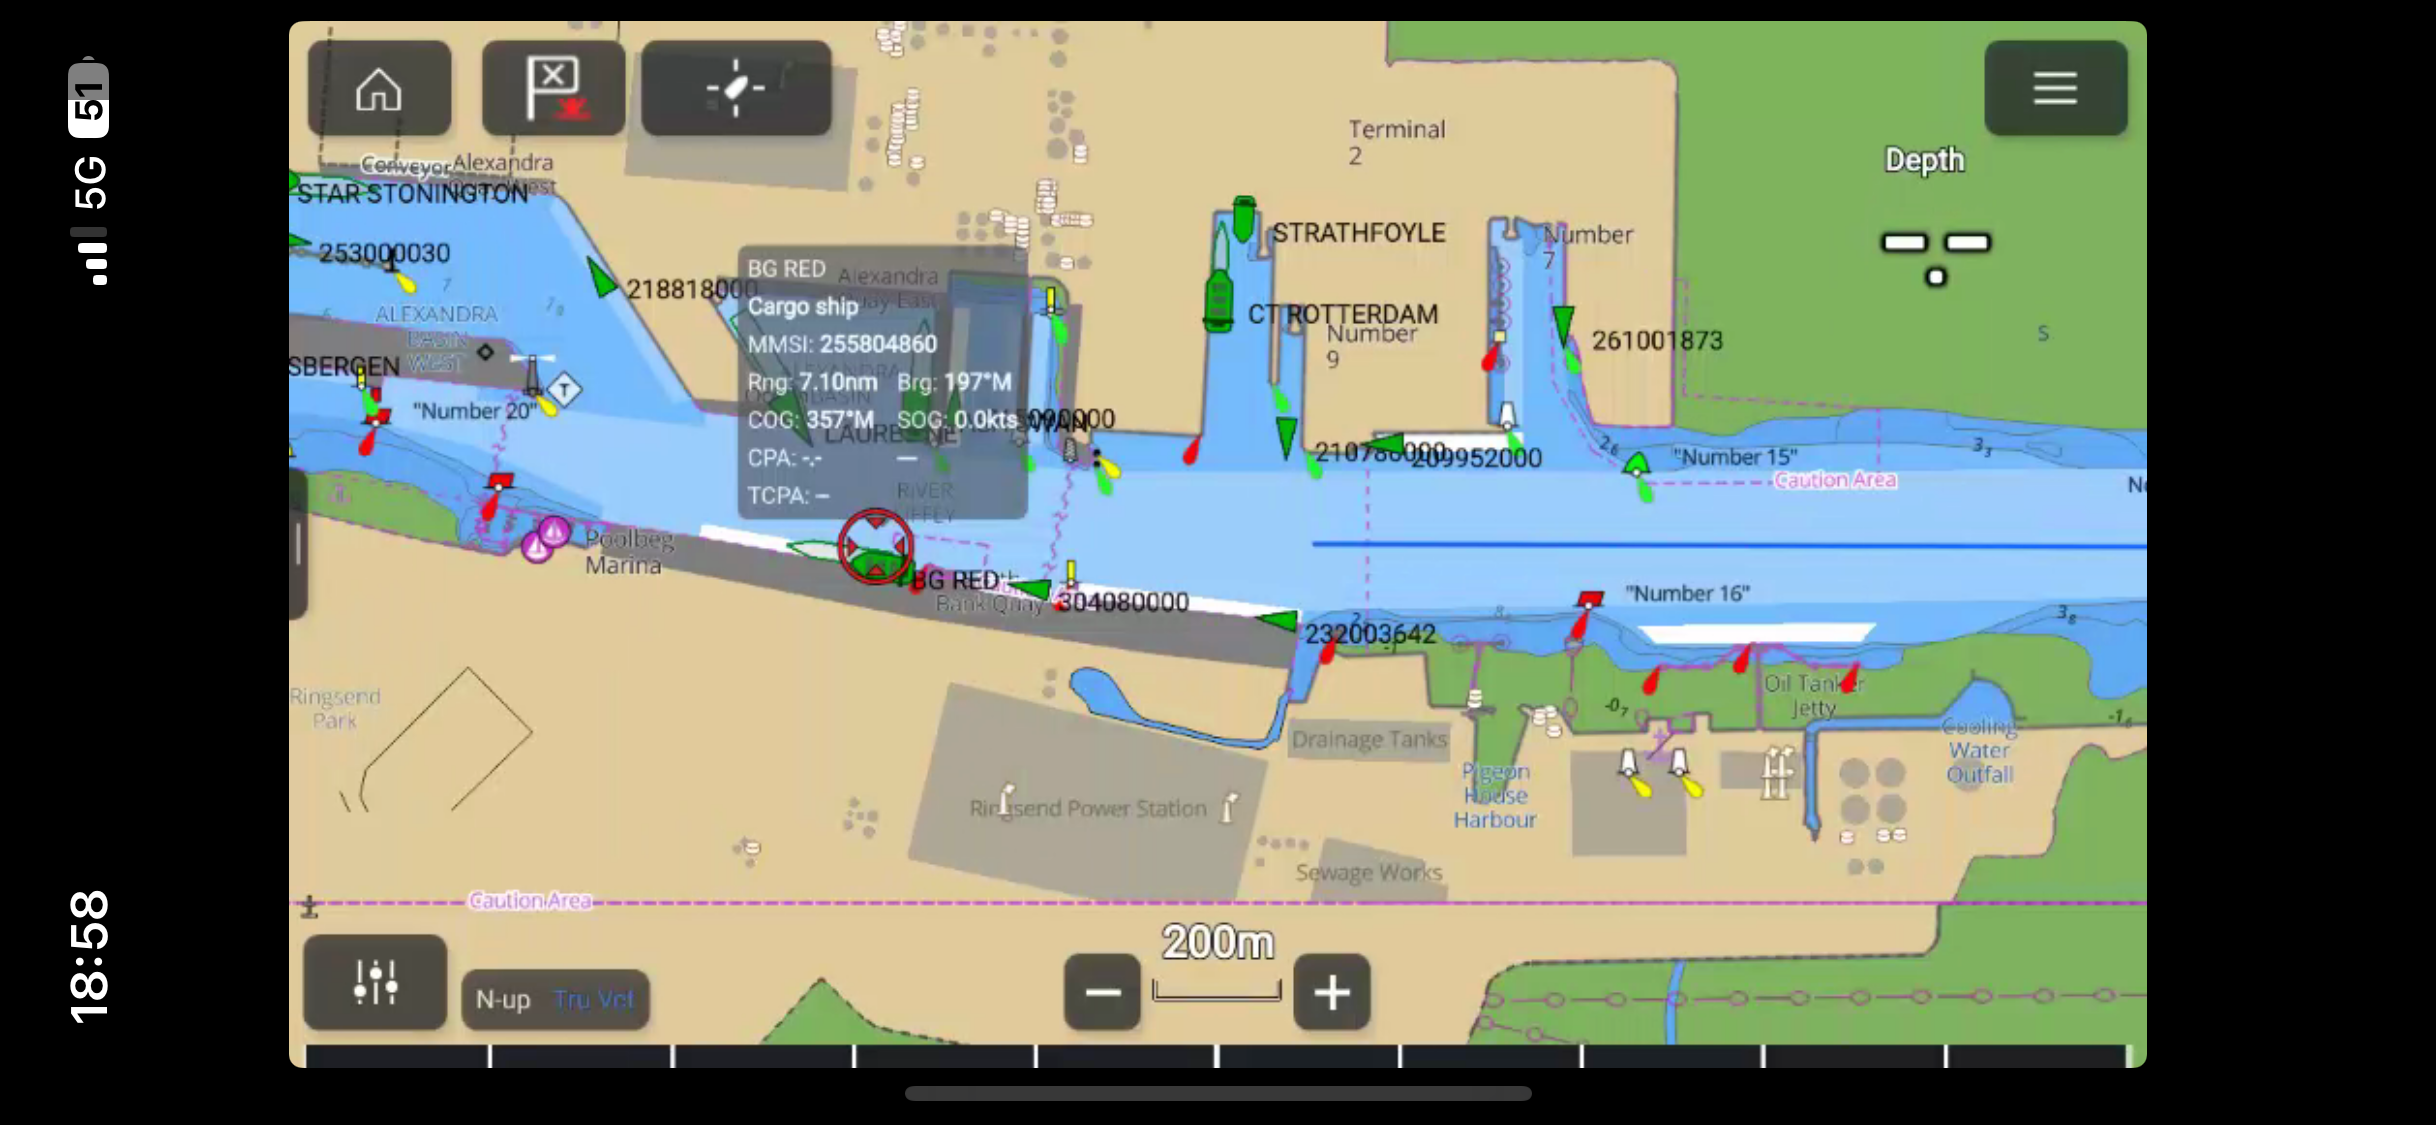
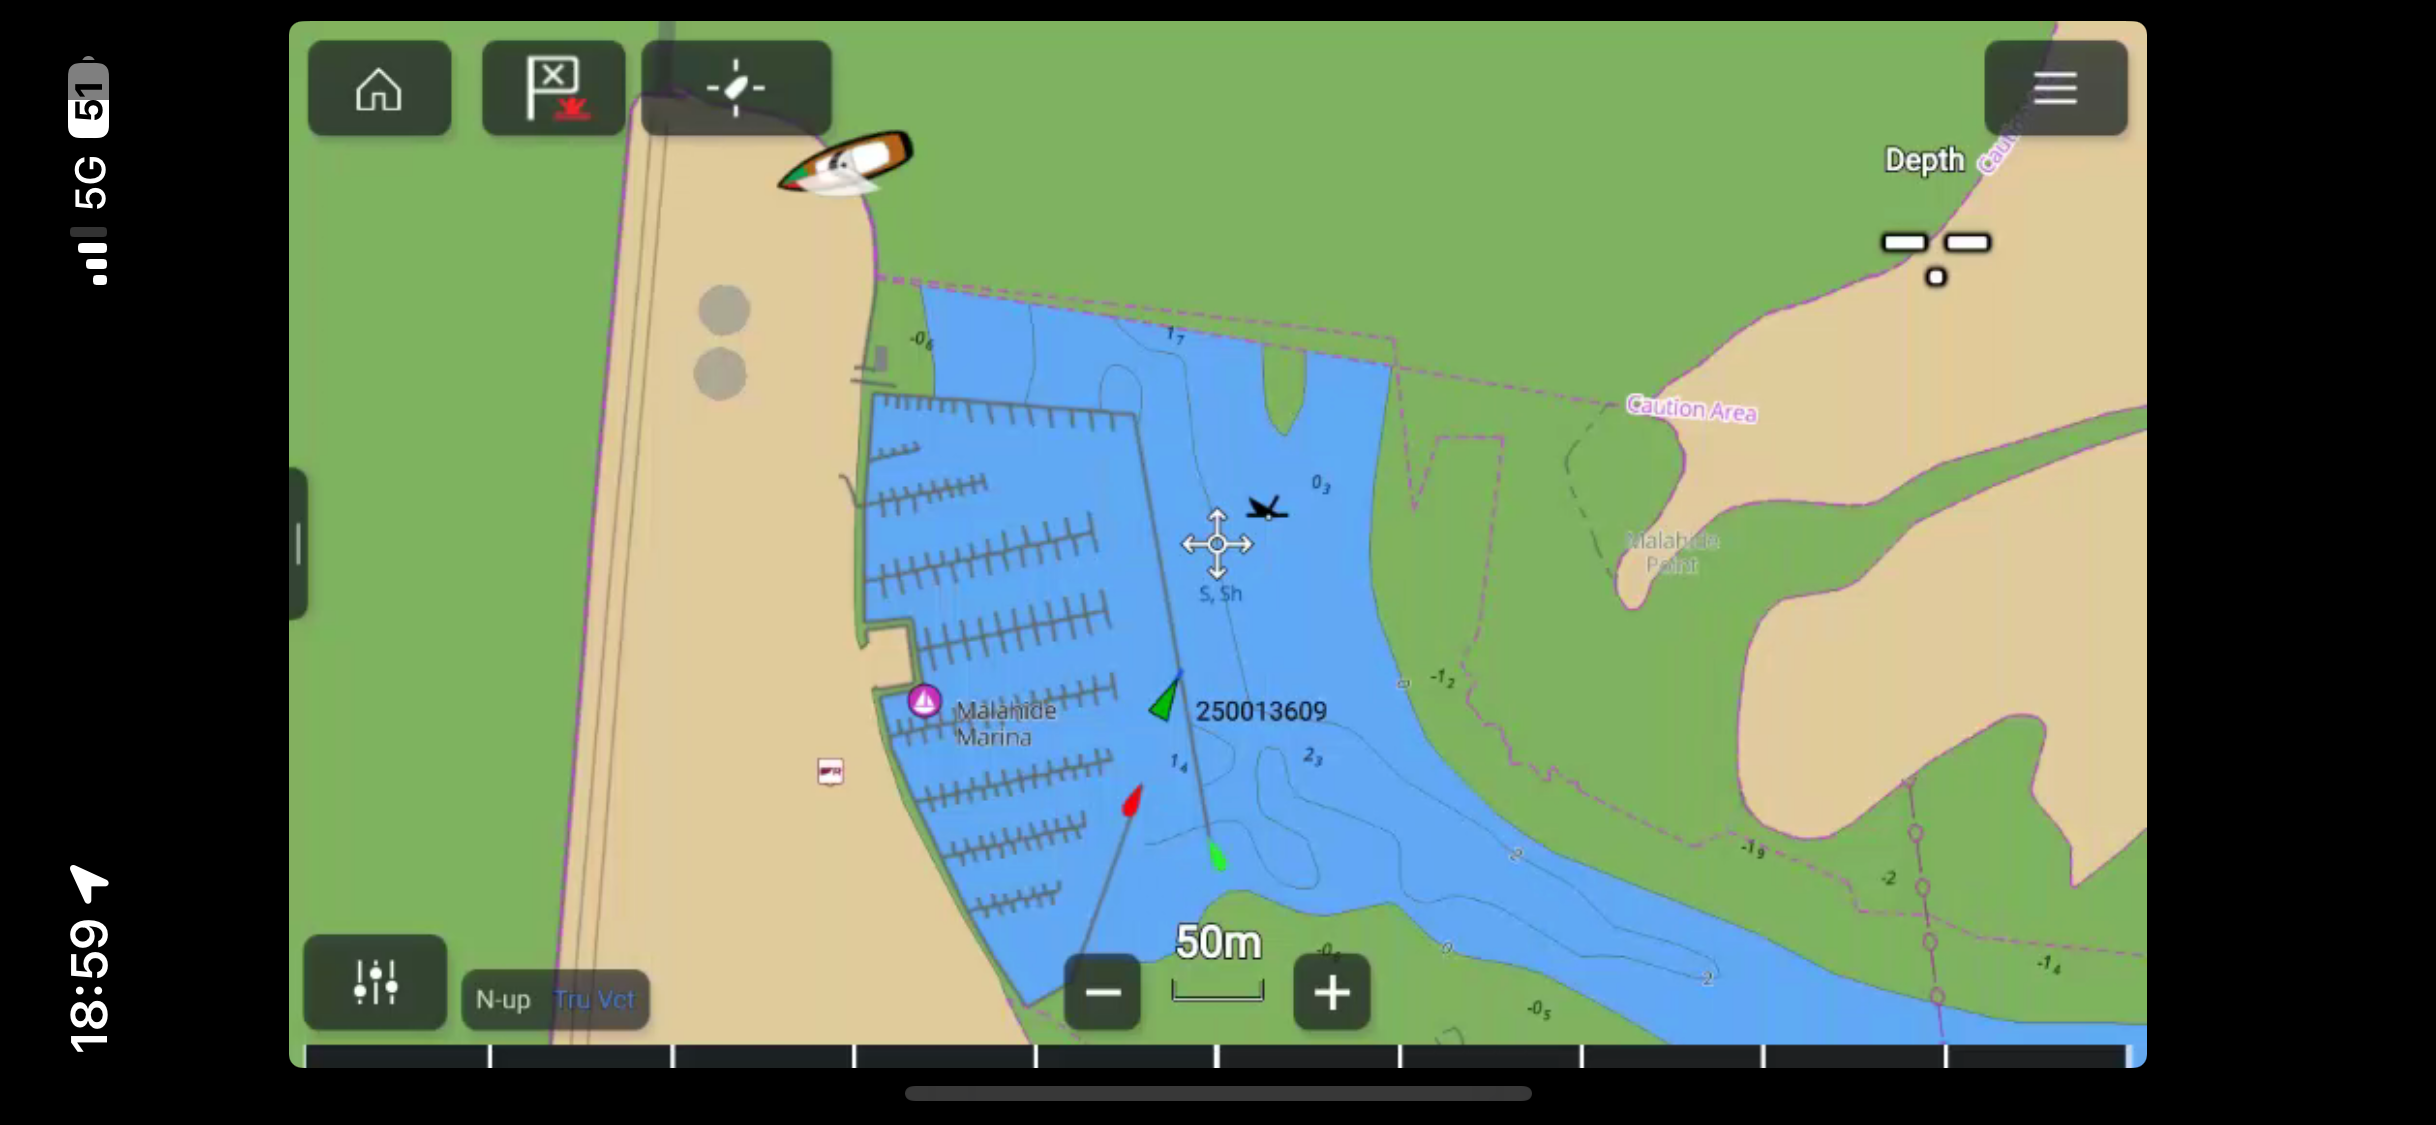
I then proceeded to spend over two hours mucking around with the Miniplex, B600S, Axiom+, i70s, AIS data, N2K connectivity, 0183 to N2K conversions and so on. My documented setup of using Wine to run the configuration software worked a treat for both the Miniplex software and the B600S software. The three photos with a time and cellular signal are screenshots from the Raymarine RayView app, communicating with the Axiom+ directly over WiFi. I also need to take some measurements, but I think it might be possible to replace the old radar head with an Axiom+ directly, without needing to move the switch panel (which looks so much nicer than anything I can find to purchase today).
There’s an unusual behaviour with the AIS data that I haven’t fully isolated yet. For a while, the ship markers were flashing between “grey” and green. Switching to the internal GPS of the Axiom+ fixed it, so I can only presume the system is picking up the GPS data from the B600S via the 0183->N2K->SeaTalkng pathing and making it the default, but the diagnostic tools indicated a poor quality fix.
The manual for the Miniplex-3 says it can talk SeaTalkng natively on port 1 (previously used for the SeaTalk1 connection), so I’ll have to revisit that once I’ve got everything cabled; I think I’ll have one spare SeaTalkng spur cable left over, so I can always chop it, fit bootlace ferrules to it, and wire it in to the Miniplex that way. That would free up the fancy N2K to SeaTalkng cable to support connecting the B600S directly to the bus. The VHF has 0183 cabling, so I’ll just run a length over to the Miniplex-3 for that and feed from it to an input terminal to get DSC and DSE sentences on to the network. Alternately, I can build a very small N2K network in the wiring cabinet as well, and feed the whole thing to the SeaTalkng bus. That’ll be for another day though.
The one oddity is that I’m getting double power on to the SeaTalkng bus – once from the dedicated power via the instruments, and also when the ACU-200 is powered up. However, having read the manual at home while writing this blog post, I can see
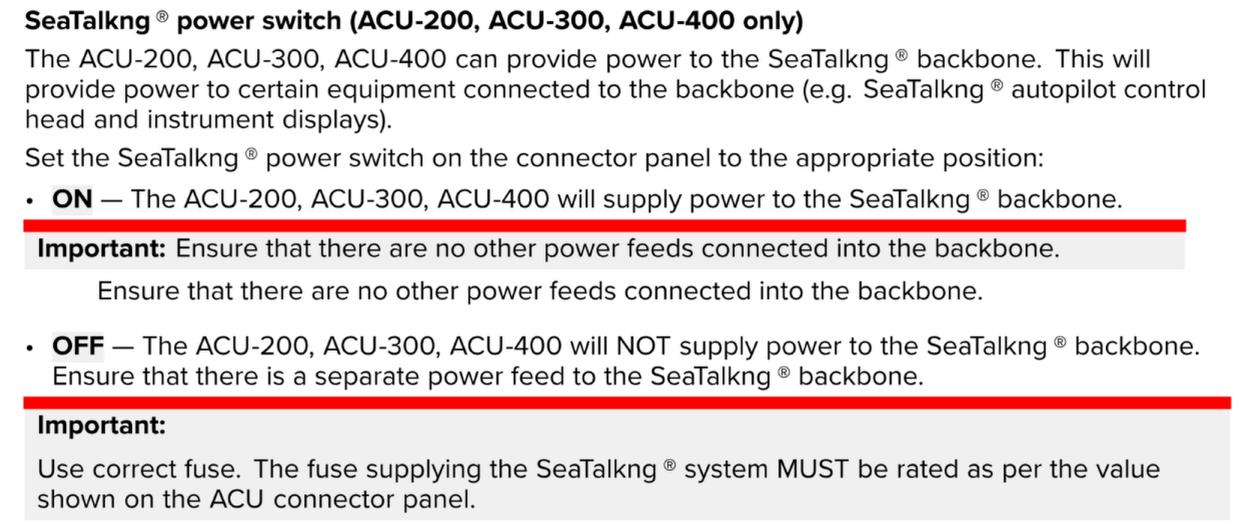
“The ACU-200, … can provide power to the SeaTalkng backbone. … Ensure that there are not other power feeds connected into the backbone.” Well, that’ll do it. I’ll have to pop the cover off and flick that switch to off so that the ACU stops supplying power to the bus.
I didn’t get to the mess of wiring below the ACU in the heads locker. That’ll be for another day. I did remember to make the hole above the i70s slightly bigger, and tested that the Wema fuel level display will fit snugly, and then put it back in the current home – behind the engine panel. Turns out a 10mm drill bit spinning rapidly will work quite well as a rasp on the edge of plywood.
All in all, an 12 hour day (plus 2 hours of travel) putting things in place. I also got the boat in to some semblance of tidiness, with berth cushions for the bow returned to the bow, tools put away, and vacuuming done. Next up is finding a suitable shackle for the anchor, working out where to add fuses, run some signal cabling from the wiring closet to the fuel tanks (to facilitate moving the Wema gauge), and probably a bit more tidying/sorting of various bits.
I want to give some thought to the current use of Wago connectors to bring all of the instrument power on to a single switch on the switch panel. It works, but they’re currently not independently fused, so they rely on the large fuse on the 12-way fuse panel which protects the whole collection. Blue Sea make that 4-way fused block (used in top right of the locker for the always-on wiring); one of those might work well (they also do an 8) to distribute power to the bus, B600S, Miniplex, and old GPS mushroom (which I might disconnect but leave the wiring for). I also need to do the same kind of distribution for the power to the helm and autopilot; I want them both on the same connection, so another small fuse block would make sense there too. The problem, as always, is where to put things in that locker – the “wall” at the back is the boat hull, so no drilling in to that!